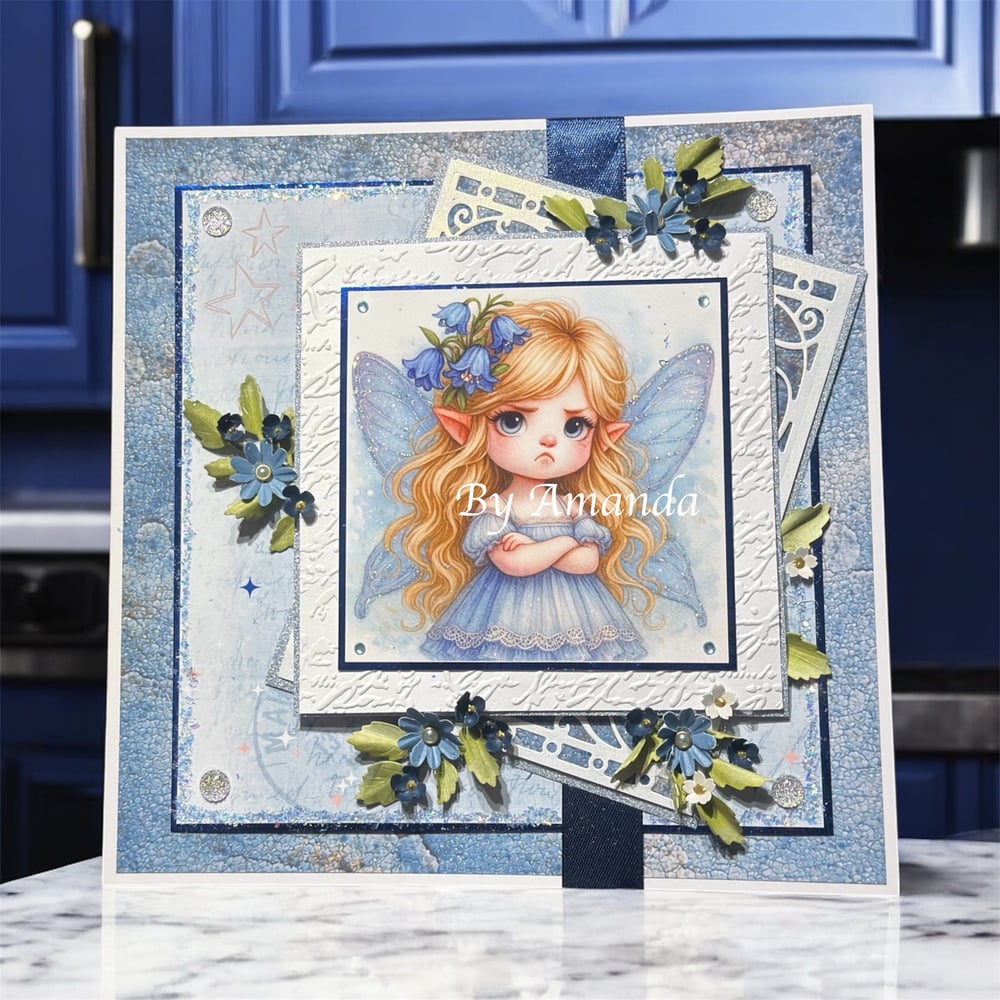
Sharing today's Flora Card
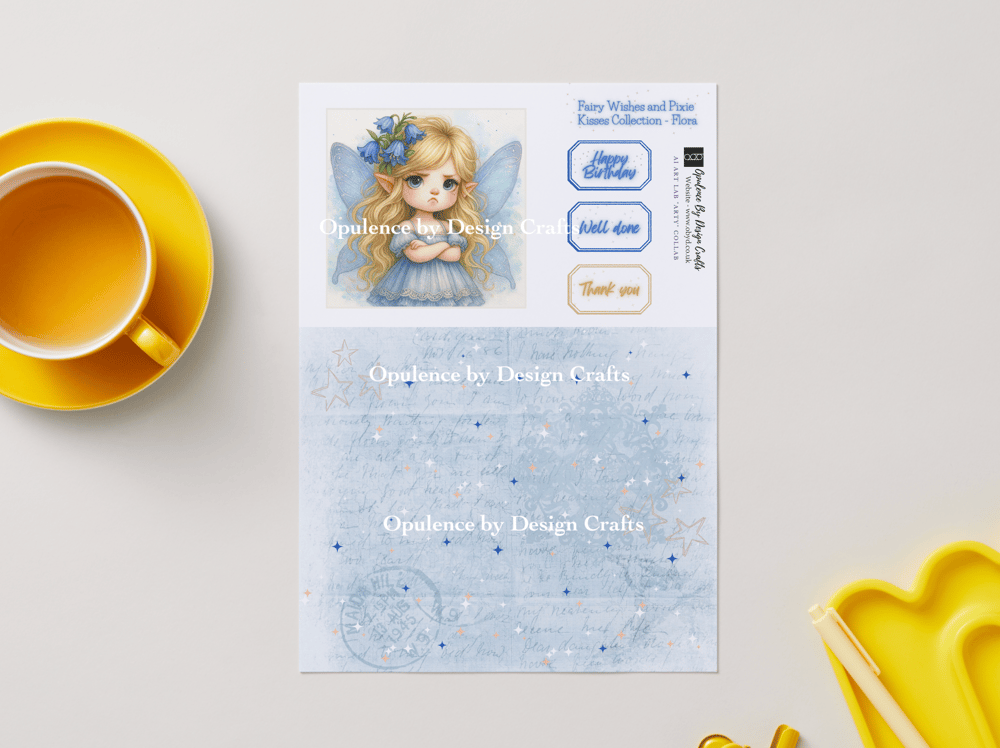
Say hello to Flora, your newest magical muse! This One Sheet Wonder PDF Digital Download packs everything you need onto a single A4 sheet — featuring a charming fairy topper with sparkly wings and a cute floral headband, a matching backing panel, and three handy sentiments: Well Done, Happy Birthday, and Thank you
Perfect for quick, whimsical makes that still feel extra special! 🧚♀️
You can find her on the website here - https://shop.obyd.co.uk/b/HBCyG

Step-by-Step Flora Card Tutorial
What I Used
- White pre-scored 8x8 card blank
- Flora sheet (printed onto photo paper for a glossy finish) you can find her here i used both the topper and backing paper panel on this card
- New Shabby Chic Paper (link below) you can find it here printed onto super smooth matte paper
- Royal blue mirror card
- Pale blue non-shed glitter paper
- White script embossed card - white card embossed with a script embossing paper
- Dark blue ribbon
- Wet glue + glitter (fairy dust )
- Die cut: Spellbinders A2 Swirl
- Die cut flowers and leaves (from my stash)
- Stickles
- Gems
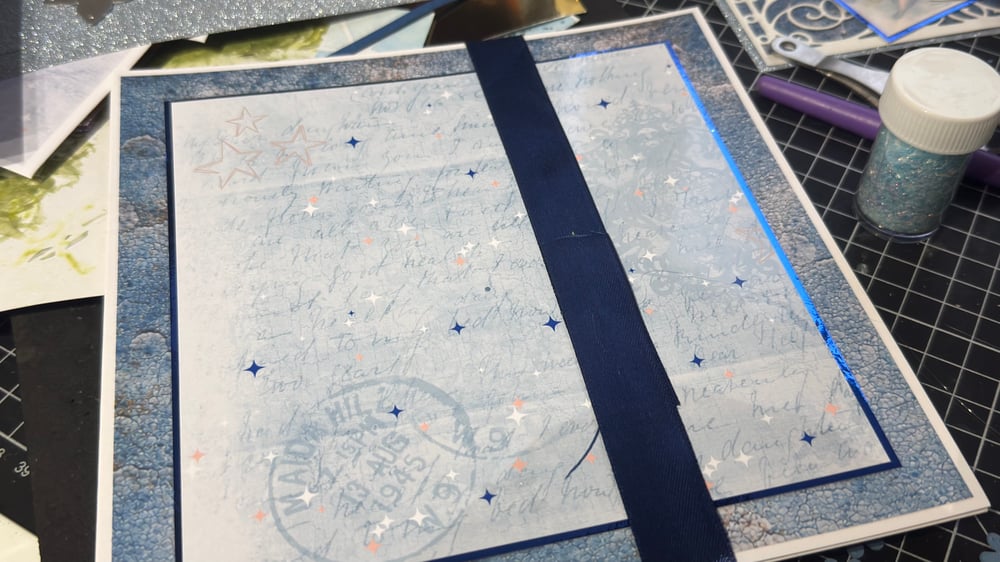
Step 1: The Card Base & First Layers
I started with a white pre-scored 8x8 card blank.
The Flora sheet was printed onto photo paper to give a nice glossy finish.
To create the layered look (there are 9 layers in total), I used the new Shabby Chic Paper (link below) as my first layer.
I trimmed this down to fit the card, leaving about 5mm of the white card blank showing all the way around.
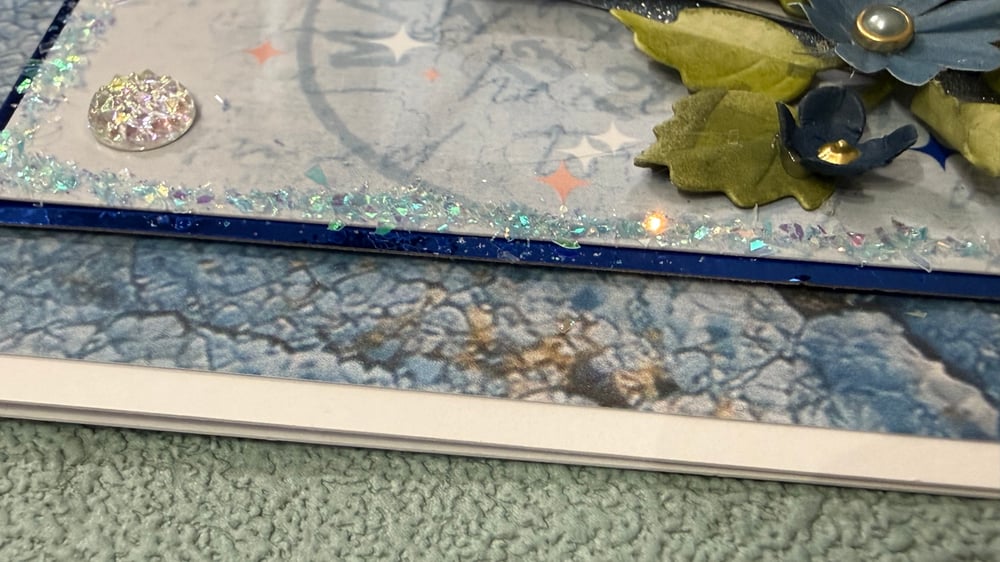
Next, I cut out the backing paper panel from the Flora sheet (link above).
I “smooshed” some wet glue around the edges of this panel and sprinkled it with a little fairy dust (glitter) , then set it aside to dry.
Once the glue was fully dry and the glitter was firmly in place, I matted this panel onto royal blue mirror card, leaving just a few millimetres showing.
This was then attached to the first layer on the card front.
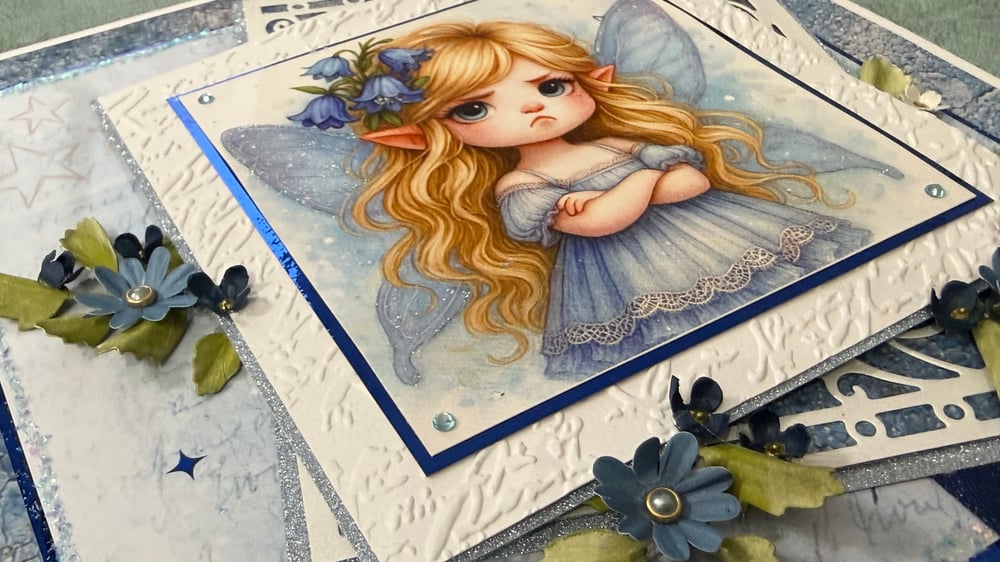
Step 2: Creating the Main Topper
For the main topper, I cut out the fairy topper and matted and layered it onto the same blue mirror card.
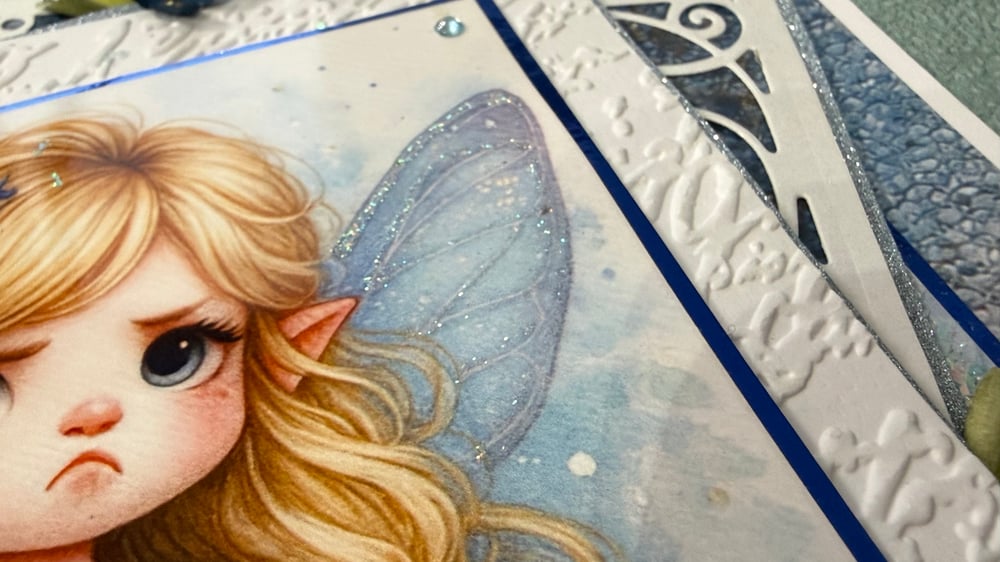
This was then added to a mat of white script embossed paper, and finally matted again onto some pale blue non-shed glitter paper.
Step 3: The Second Topper (Die Cut)
The second topper is a die cut using an older Spellbinders die called A2 Swirl.
I cut this out and matted it onto the same pale blue glitter paper to tie everything together.
Step 4: Assembly
I wrapped some dark blue ribbon around the front panel of the card and secured it on the front, placing it where I knew the main topper would hide the glue.
I then added the die cut topper slightly on the wonk (at an angle). This is a great way to add interest and different-shaped layers — it can be tricky to put a rectangle mat under a square topper without it looking a bit odd, so this is how I like to do it.
Next, I added the main topper on top.
Step 5: Flowers, Leaves & Finishing Touches
I used die cut flowers and leaves from my stash. I have pots and boxes full of pre-made die cuts, hand-coloured leaves, and handmade flowers. I do batch-making sessions so I always have these ready — it really speeds things up when I’m in sample-making mode!
I tucked and glued the flowers and leaves around the topper, sliding the stems neatly under the main topper.
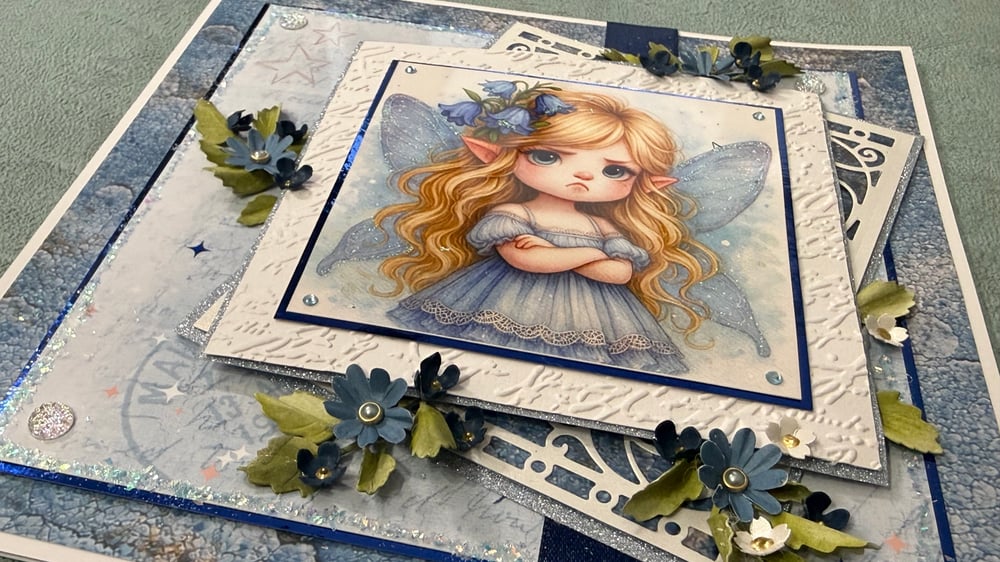
To finish, I applied Stickles to the fairy wings to highlight the details and add some sparkle ✨
Finally, I added gems in the corners of the backing paper and in the corner of the topper to complete the card.
I intentionally left some space to add a sentiment later.
I really hope you’ll give this card a try, and if you do, please share it with me so I can see what you’ve created — I truly love seeing what people make with my designs. And if you’re not already a member of our Facebook groups, why not pop over and join us? It’s a lovely, friendly community full of inspiration, ideas, and support, and I’d absolutely love to see you there
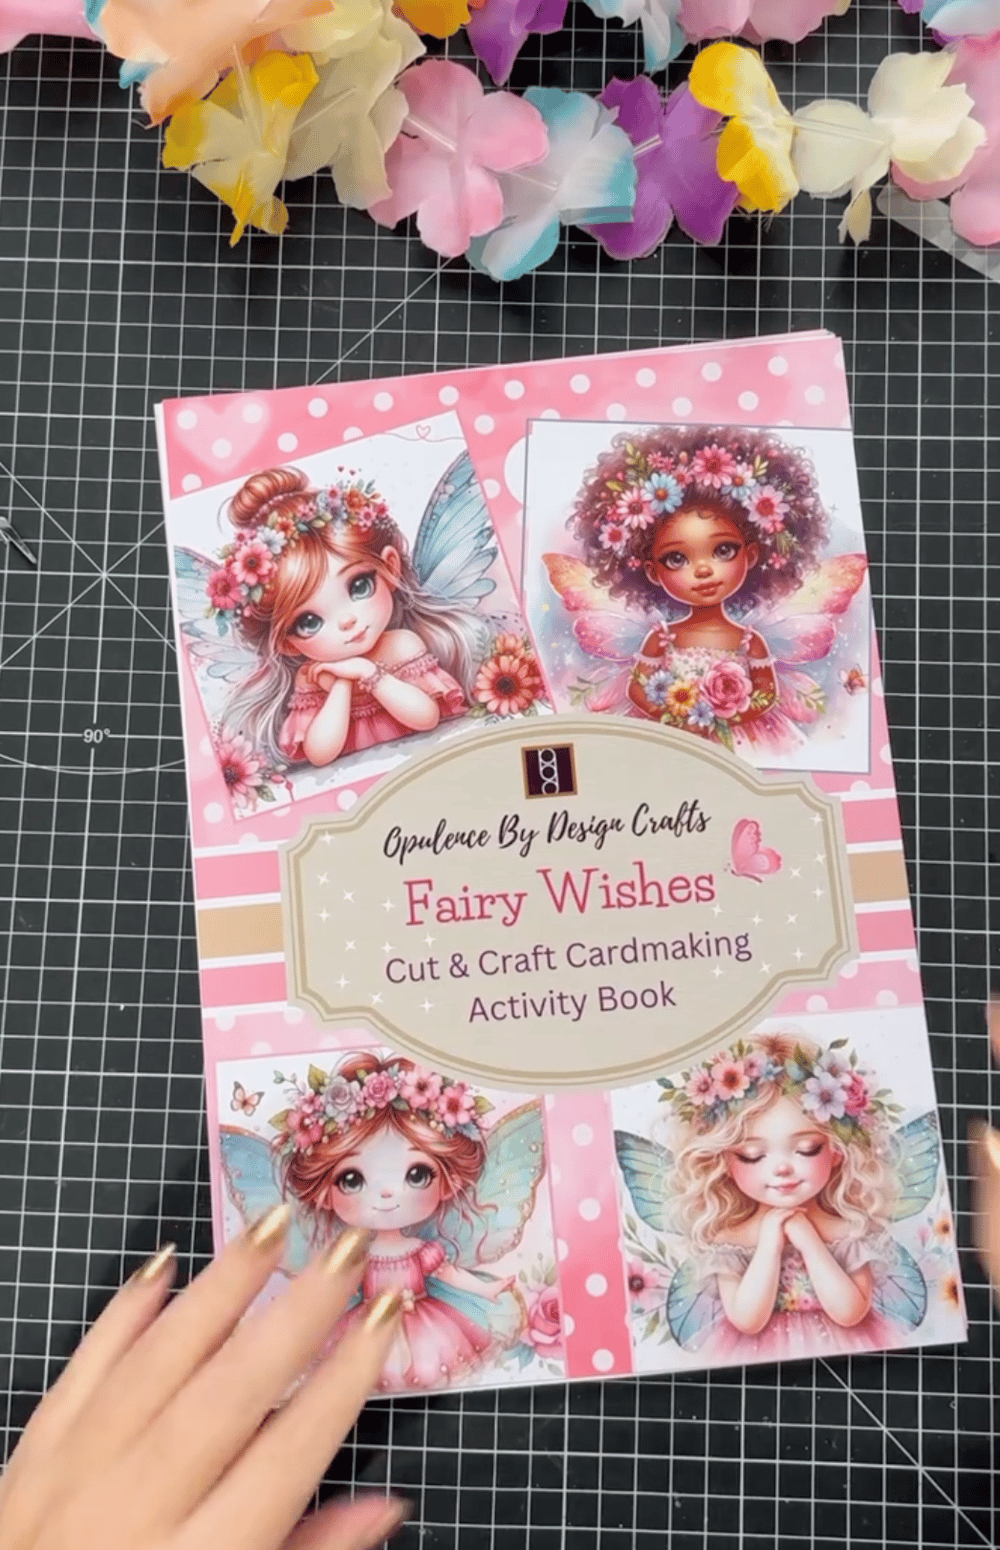
We have a lovely range of Fairy Wishes cardmaking downloads and already printed kits/ books
You can find the downloads here
The Books are available on amazon worldwide - you can find the links for these here
🎨 Facebook Group – A lovely, welcoming community full of inspiration and crafty chats:
💖 Facebook Page – Stay up to date with launches, lives, and special offers:
📝 Crafty Blog – Behind-the-scenes, tutorials, and updates:
🛒 Download Shop – Packed with digital papers, sentiments, and more:
🌐 Main Website – Explore everything Opulence by Design:
Instagram - Give me a follow for lots of info - https://www.instagram.com/opulencebydesignca/
📚 Amazon – For my Cut & Craft printed books and kits (great for those who love physical items!):
👉 Check out all of my books here on amazon
📌 Pinterest – I’ve been busy adding card samples and inspiration to my boards!
It would mean the world if you could pop over, have a peek, and give me a follow 💕
👉 Check Out My Pinterest Boards
And for everything in one place, all of our socials are right here:
Comments
Post a Comment