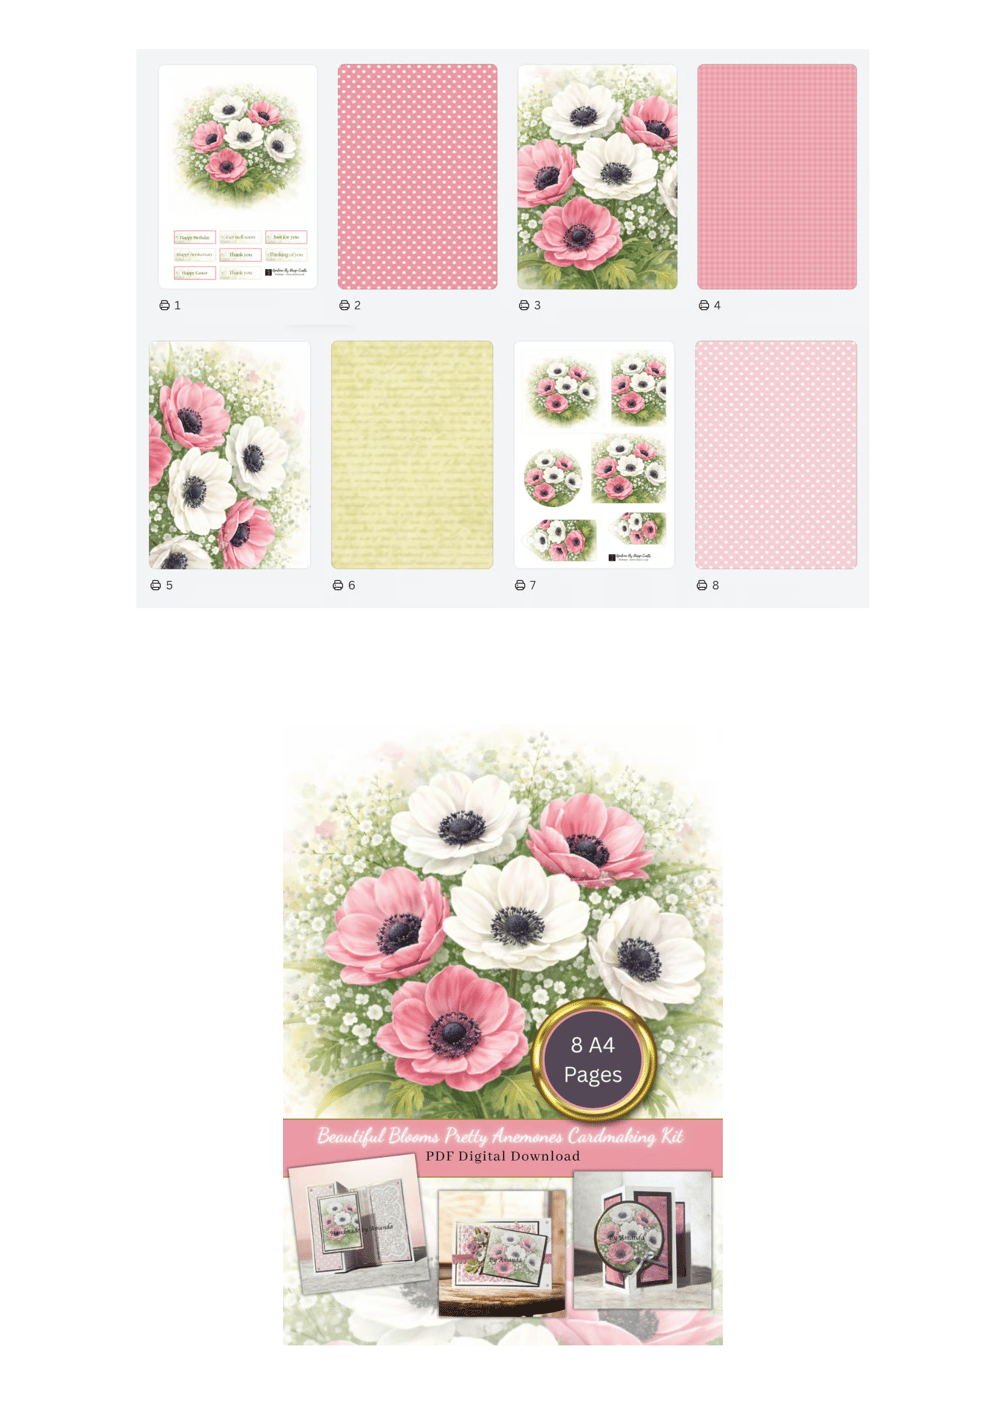
From Printer to Pretty: Exploring the Beautiful Blooms Anemone Kit
Beautiful Blooms: Crafting with Anemones & Your Stash
When I was designing the Beautiful Blooms: Pretty Pink and White Anemones kit, I wasn’t just thinking about creating another pretty paper collection. I wanted to create something that would be a real workhorse kit — the kind you can reach for again and again and easily mix with what you already have in your craft room.
You can find the kit on the website here
One of my favourite things about this collection is how well it works with your existing stash. The anemone designs make lovely focal points, which means they pair beautifully with embossing folders, die cuts, frames, and textured backgrounds. You can keep things clean and simple, or build up layers and detail — both approaches work really well with these florals.
While making the sample cards, I had so much fun experimenting with different looks and styles. Some cards are soft and elegant, others are more layered and detailed, and a few are perfect for quick, pretty makes when you’re short on time. The patterned papers and script background give you plenty of options for adding interest without overpowering the main design, and the topper elements make it easy to create a strong focal point with very little effort.
I also had a lot of fun printing the designs onto different papers — super smooth cardstock, photo paper for a glossy finish, textured card for added interest, and even vellum for a softer, more delicate look. It really changes the feel of the designs, so don’t be afraid to experiment and see what works best for your style and projects.
This is very much the kind of kit that shines when you start mixing digital elements with your physical supplies. Think embossed backgrounds with a floral focal point, die-cut frames around the anemones, or even using the elements in journals, scrapbook pages, and other paper craft projects.
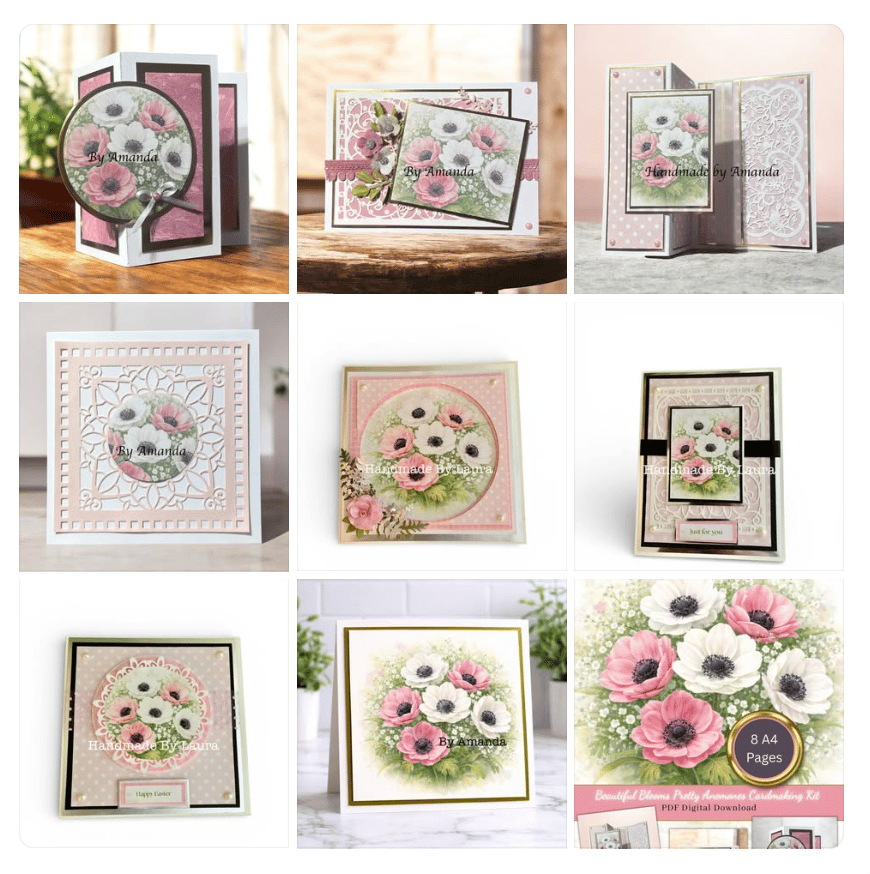
I’ve shared lots of sample cards to show just how versatile this kit can be, and I hope they give you plenty of ideas for your own crafting. A huge shout out goes to our Laura too who has made some stunning design team samples. Here is a look at all of the samples
Handmade z-fold card using the polka dot papers and Anemone toppers from the kit
Lots of lovely layers using gold mirror card and a fab Spellbinders die cut from my stash
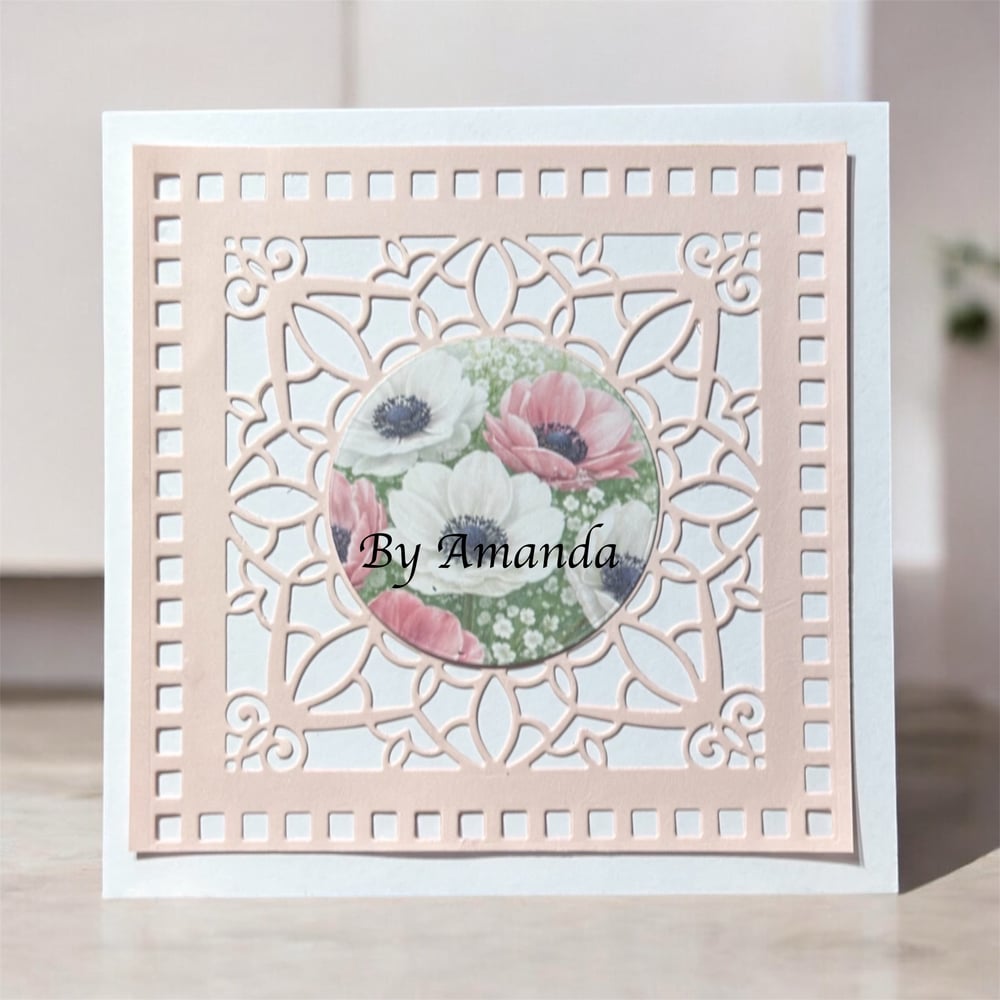
Really quick and simple 5x5 card using a really old spellbinders die and the Anemone circle topper from the kit
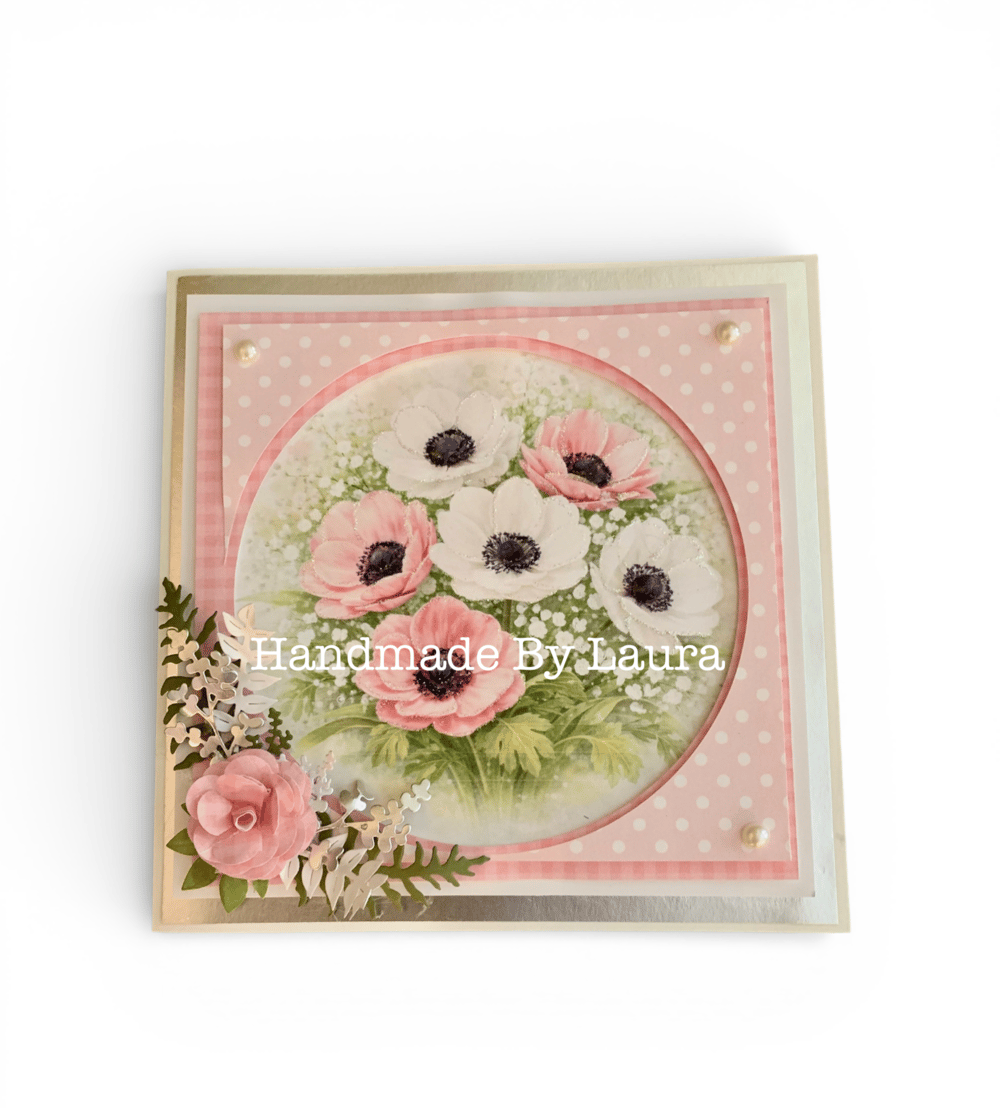
Laura's 6x6 card - using the polka dot and gingham paper from the kit along with one of the Anemone images from the kit - lots of lovely layers and finished with some lovely die cut foliage and a handmade punched flower
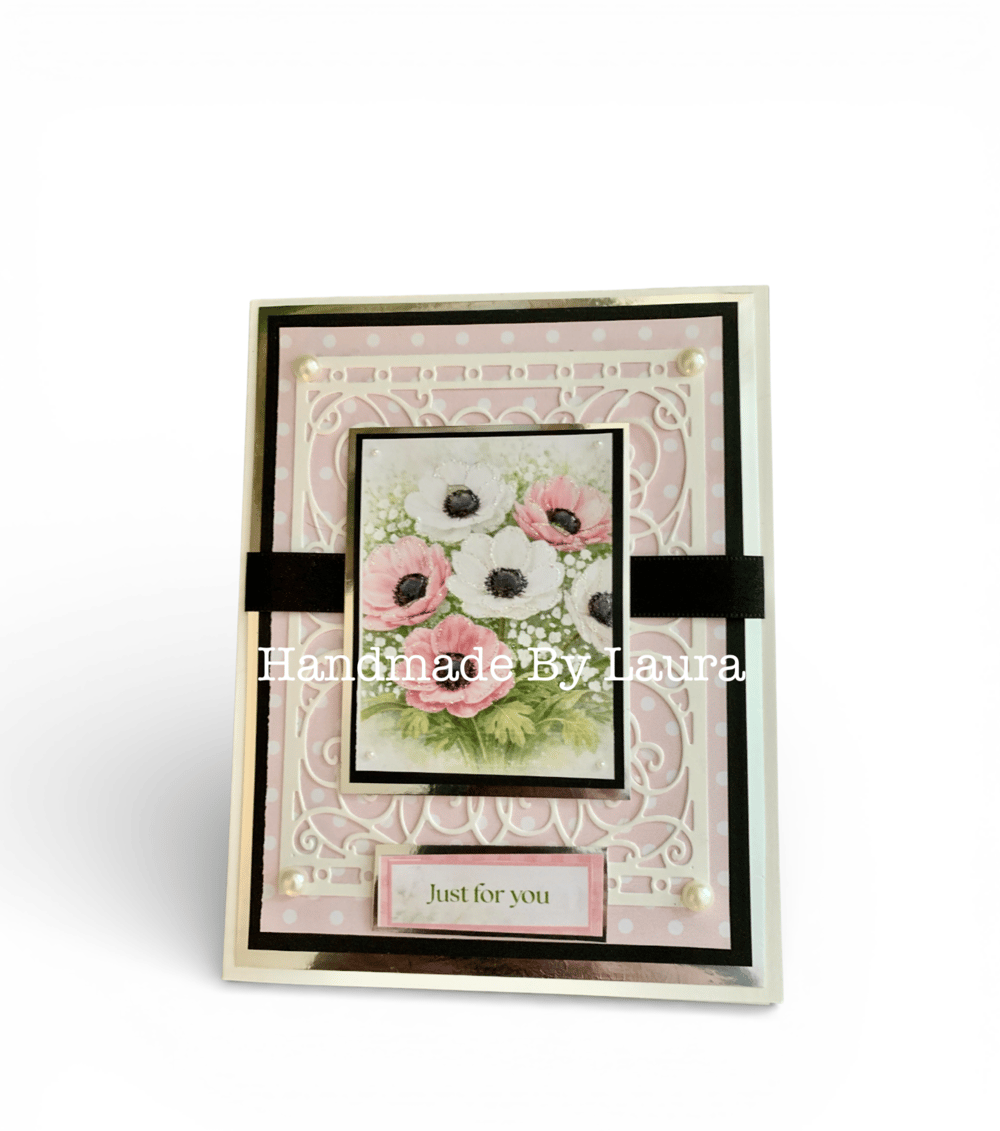
5x7 card using the polka dot paper, sentiment and topper from the kit
Spellbinders a2 Swirl die cut
Gems
Silver mirror card
black card
black ribbon
(i just love the pale pinks, white, silver and black combo!)
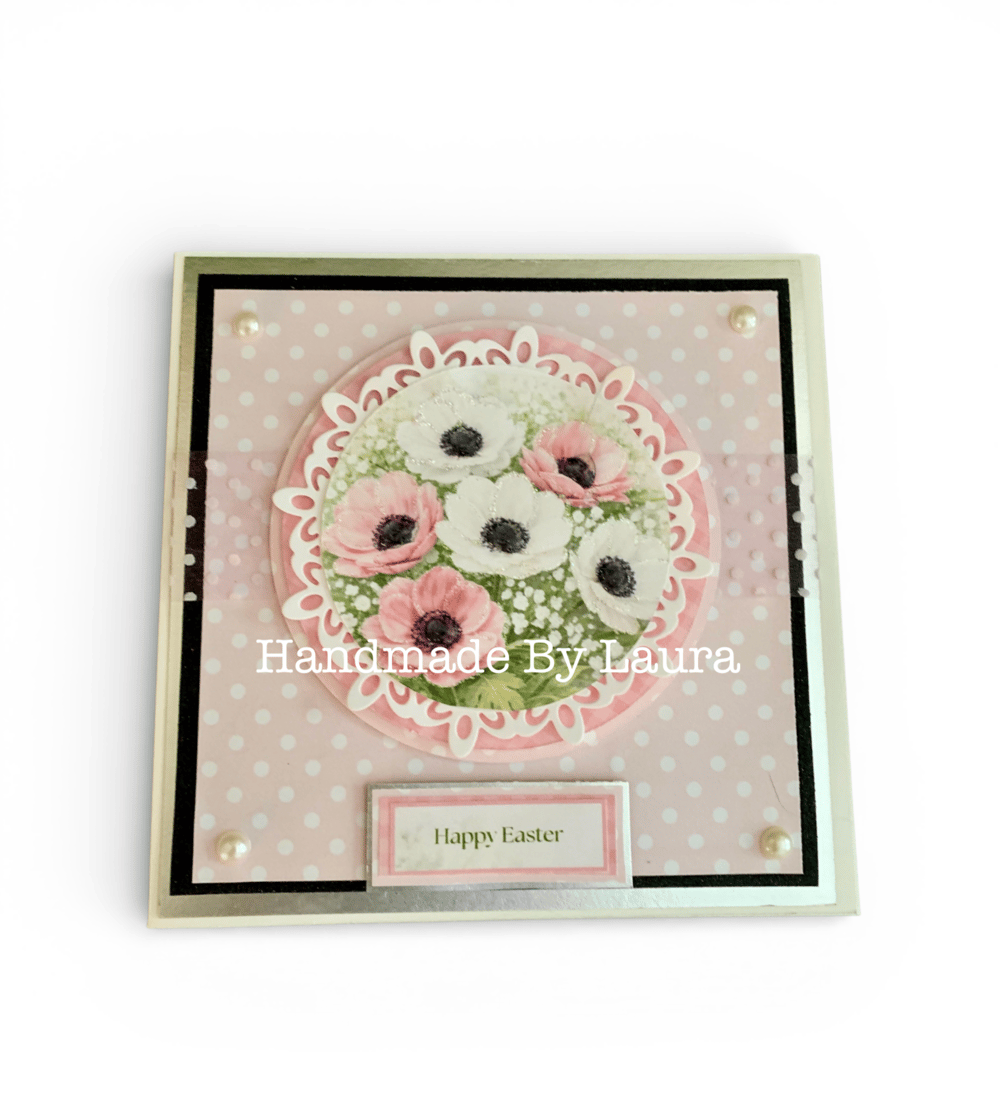
5x5 card - the papers, sentiment and topper are from the kit
combined with a beautiful circle die cut, super cute polka dot sheer ribbon, black card and silver mirror card and a few pearl gems
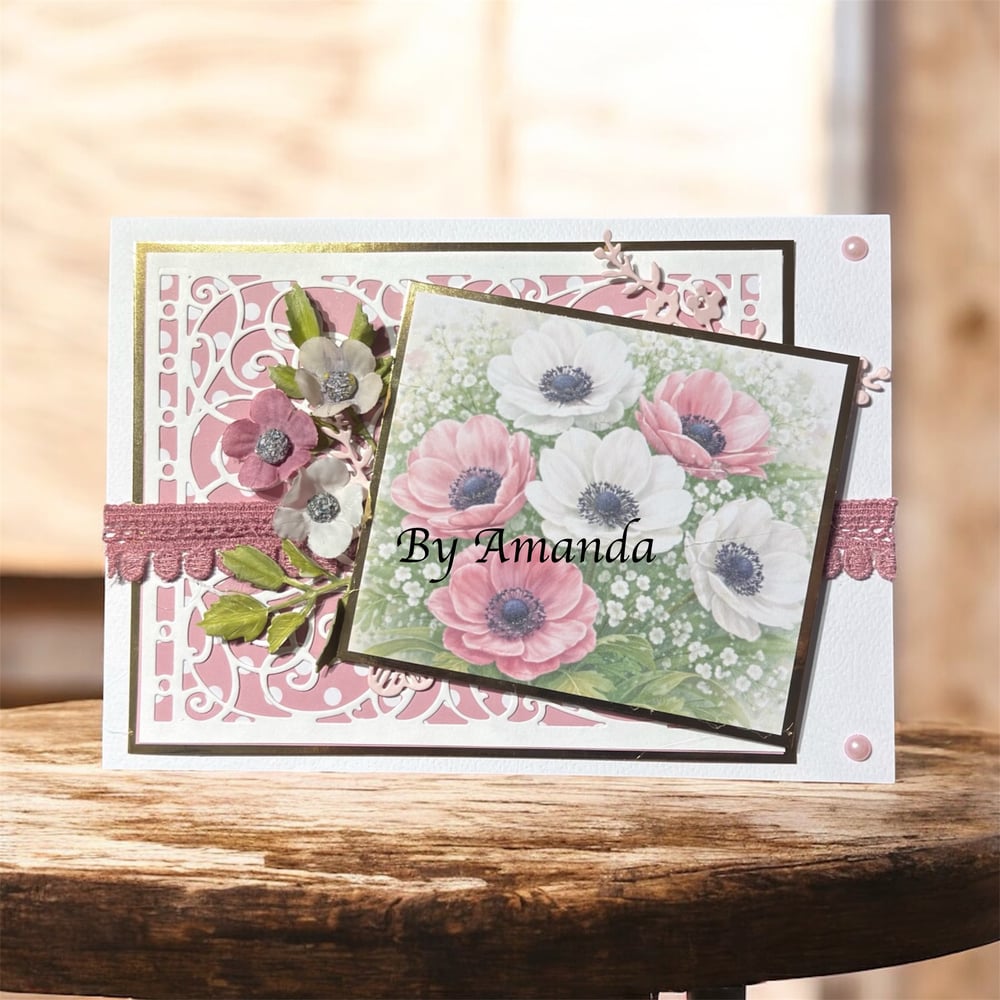
My 5x7 landscape card
The polka dot paper used behind the die cut and topper are from the kit
Spellbinders foliage die
Small artificial flowers (i thought these matched the anemones perfectly)
Some dusty pink trim
Gold mirror card
Pale pink faux pearl gems
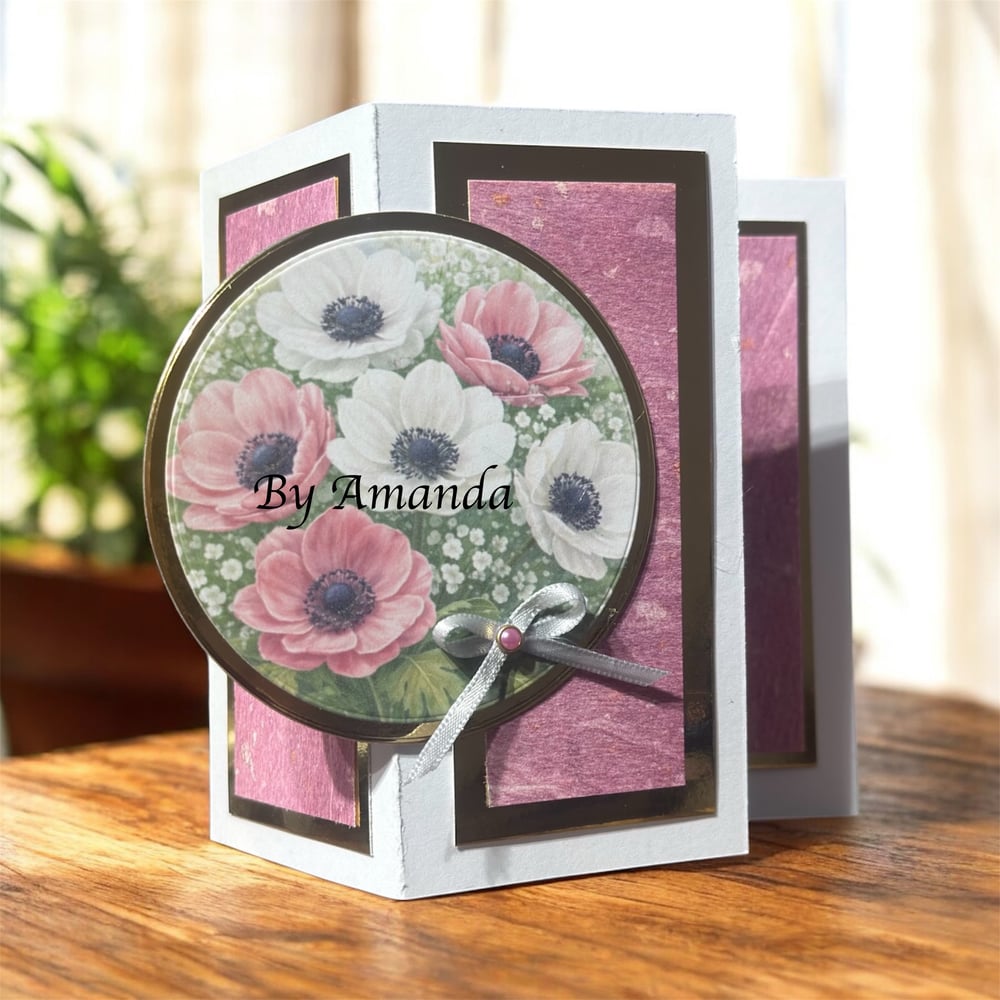
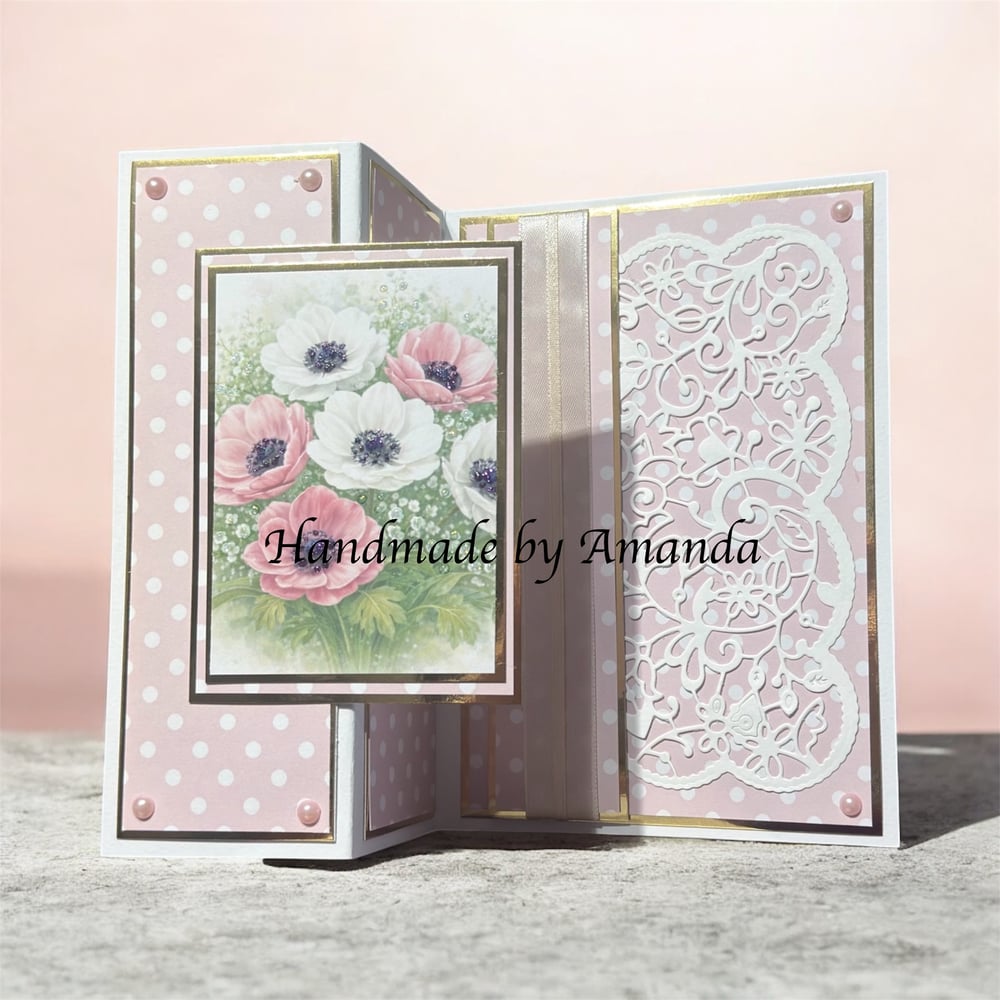
This is one of those lovely illusion cards that looks quite fancy but is actually very simple to make. The card base is a 5" x 5" card blank, and the front panel was scored vertically down the centre, folded, and then burnished. The panels were decorated with some handmade pink paper and gold mirror card.
I cut out the topper using a circle die, and then used the next size up from the same nesting die set to cut a layer of gold mirror card before matting and layering the topper on top. Now, this is the magic part: with the card standing as pictured, I glued the topper on the right-hand side only. This allows the card to still open and close while keeping the illusion effect in place.
Just make sure the topper stays within the flat square area of the card front so it will still slot nicely into the envelope that came with the card blank.
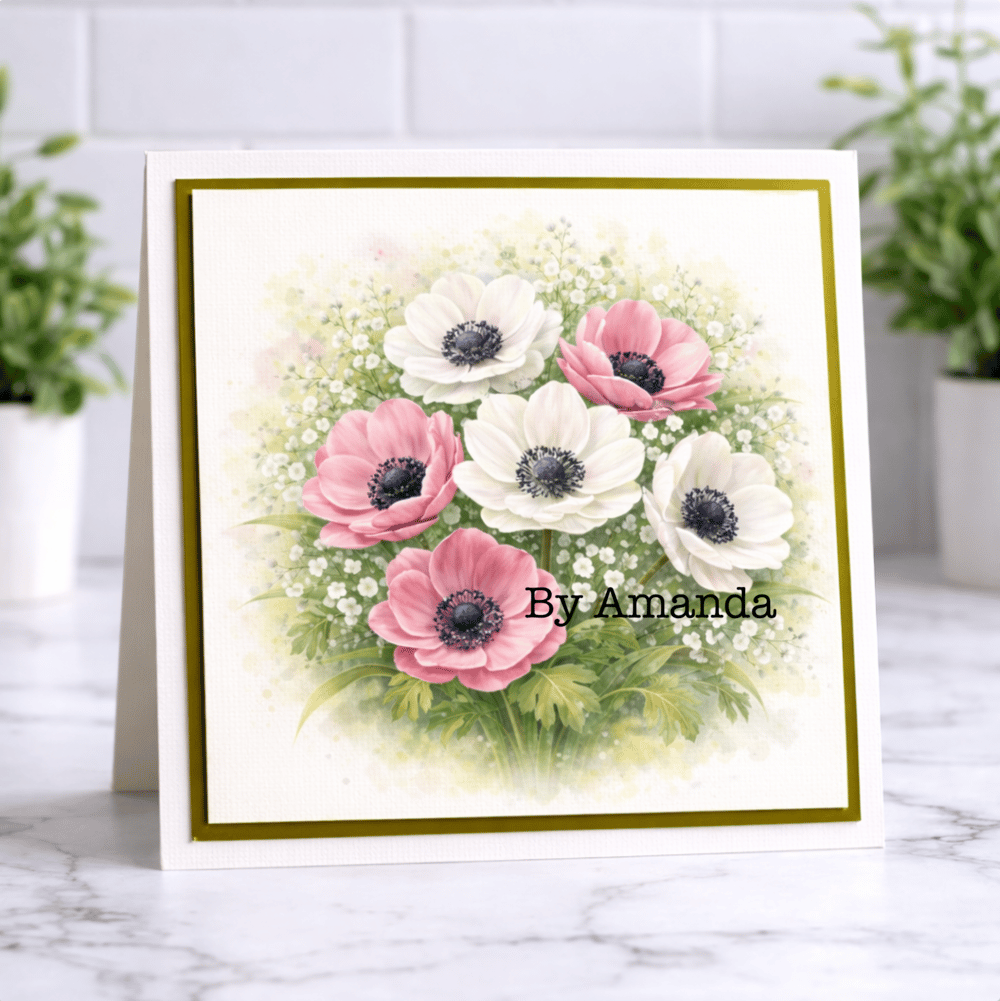
This next card is a simple square design. The image was printed onto photo paper to give it a lovely glossy finish. I matted and layered the main image onto a mat of matte gold mirror card and then onto the card base, leaving a nice, even white border of the card blank showing.
I’ve kept this one clean and simple, but it really has the potential to be taken so much further. While still keeping the card flat, you could add some ribbon or flat embellishments, or a little Stickles for some glittery sparkle. If you’d like to add more dimension, you could cut out some of the flowers from another print of the same sheet to create your own decoupage elements and build up beautiful layered flowers on your card. You could also mix in some die-cut flowers in and around the gypsophila for a lovely 3D floral effect, and finish it off with a few gems, beads, or maybe even a bow.
The choice is yours, and it’s a great design to really make your own.
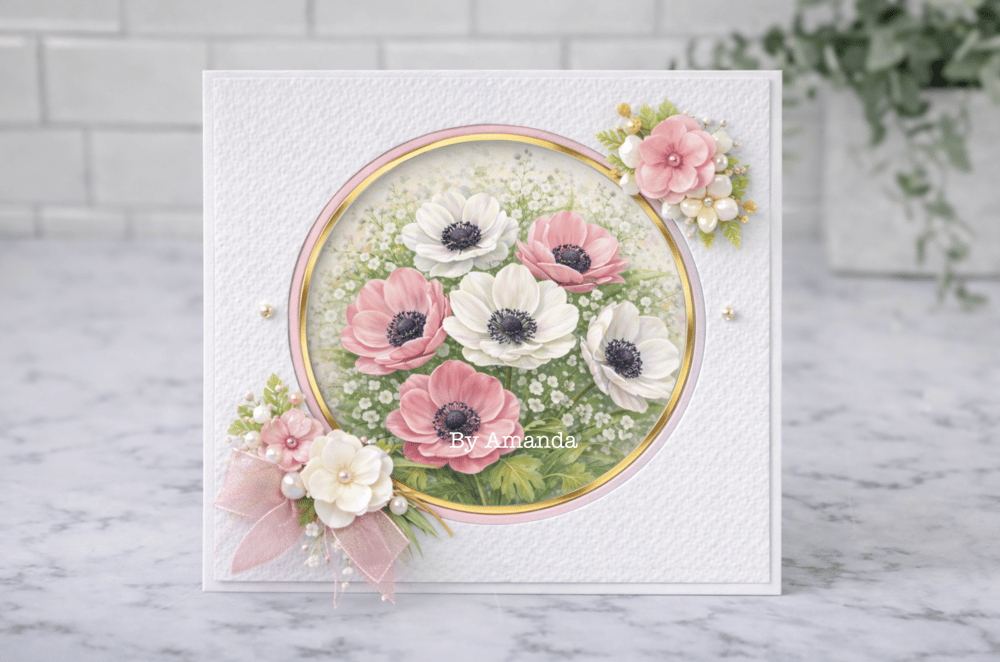
I had so much fun creating this one — I absolutely love making aperture cards! I started with some really pretty, bright white textured cardstock to cut the window. I then placed the image, using the aperture as a guide to know exactly where to glue it down on the card base so that the floral image sits perfectly in the centre of the window.
Next, I used nesting circle dies to create the inner frames of the aperture, almost like mounting a picture in a frame. To give the layers some dimension, I used dimensional foam tape on a roll, which helped space everything evenly.
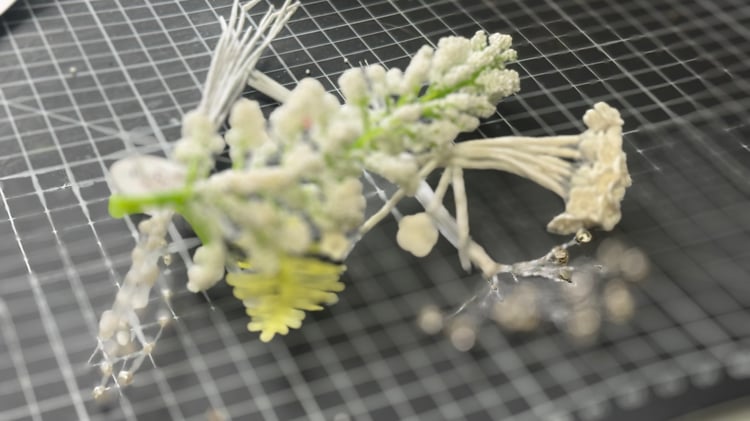
Then came my favourite part — the embellishments! As a florist, I always have lots of leftover “bridal” bits from projects, like wired gems, pearls, and tiny artificial stamens. I also added some of my new flower gems — I think they’re made from resin — and they’re super cute and complement these flowers beautifully. It was such a joy to really go to town on this card and make it sparkle!
Again, if you would like me to do a video with some of these wire embellishments - please reach out.
This is one of those cards that is so much easier to show someone in person, as it can be a bit fiddly for your first attempt. But once you have the technique down, it becomes much easier and really fun to do. I hope these instructions help you give it a try!
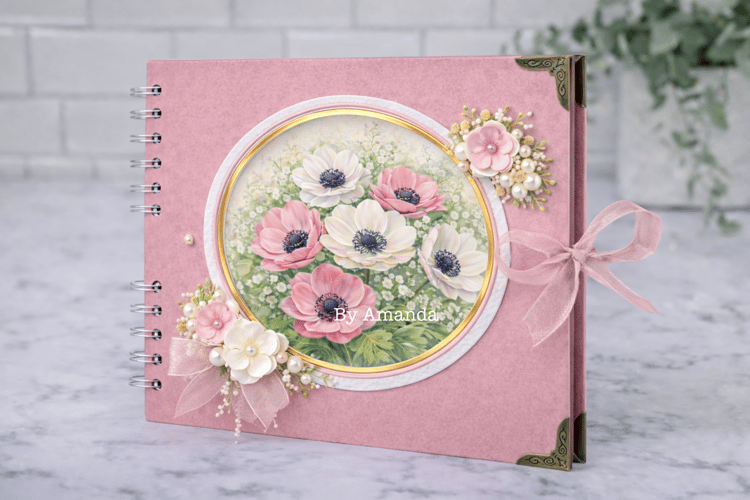
I have to admit, I cheated a little with this one — this is a pre-made album I picked up from Amazon. They come in a variety of sizes and colours, which makes them really versatile.
If you like the idea of album crafts or junk journals but want to dabble before diving in fully, these albums are perfect. You can decorate them without having to worry about the construction side of things, which makes the whole process much simpler and more fun.
They also make wonderful gifts for someone to personalise, and are fab for little craft fair projects too. It’s totally up to you whether you want to decorate just the front cover or take the fun inside as well!
If anyone would like the link for this album on Amazon in the UK, just let me know and I’ll have a look through my orders for you. Please ask in the Hobbies, Home and Sharing group, as I can post links there.
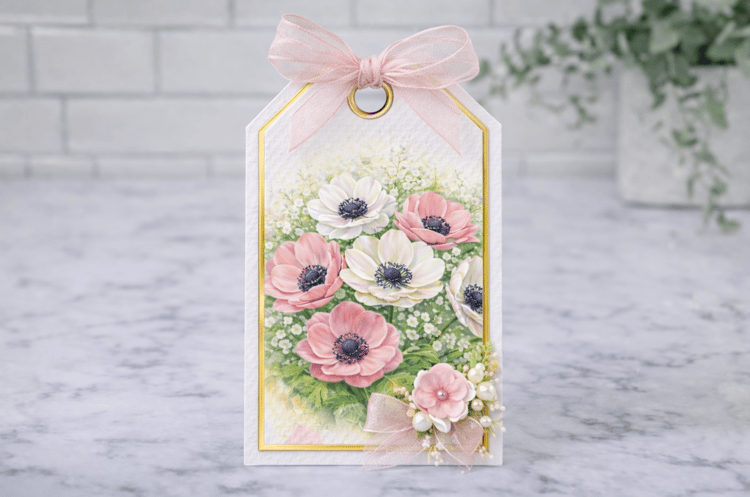
Last but not least, I had so much fun making this little tag using some of the bits I’d already got out while decorating the album and card above. It would have been a shame not to use them when they were just sitting on my craft mat!
I hope this post has given you lots of ideas and inspiration. And if you’re looking at these projects and thinking you can’t achieve the same look — maybe because you don’t have a die-cutting machine — here’s a little tip: you can cut circles and shapes with shape cutters! There are little acrylic shapes available with a track system. You get a tool with a blade, and when you run it around the track, it cuts out the shape perfectly. Just a little food for thought if you want to try something similar.
If you’d like me to show how these work in a video, let me know — I’d be happy to!
As always, I’d absolutely love to see what you create with it — especially if you put your own stash to work alongside these florals.
Happy crafting 💕✂️🌸
Looking for a little more creative inspiration?
If you’re enjoying the journey so far and feel like exploring a bit deeper, I’d love to welcome you across some of our other crafty spaces. Whether you're here for the inspiration, the community, or just a quiet moment to create, there's something waiting for you.
🎨 Facebook Group – A lovely, welcoming community full of inspiration and crafty chats:
💖 Facebook Page – Stay up to date with launches, lives, and special offers:
📝 Crafty Blog – Behind-the-scenes, tutorials, and updates:
🛒 Download Shop – Packed with digital papers, sentiments, and more:
🌐 Main Website – Explore everything Opulence by Design:
Instagram - Give me a follow for lots of info - https://www.instagram.com/opulencebydesignca/
📚 Amazon – For my Cut & Craft printed books and kits (great for those who love physical items!):
👉 Check out all of my books here on amazon
📌 Pinterest – I’ve been busy adding card samples and inspiration to my boards!
It would mean the world if you could pop over, have a peek, and give me a follow 💕
👉 Check Out My Pinterest Boards
And for everything in one place, all of our socials are right here:
Comments
Post a Comment