Pansy Card Tutorial – Step-by-Step Z-fold Card Guide
Published: November 10, 2025
Pansy Card Tutorial – Step-by-Step Z-fold Card Guide
I’m so excited to share today’s new release — the Pansy Sheet!
It’s a simple yet elegant make that’s perfect for spring birthdays, thank-you cards, or just a cheerful note to brighten someone’s day. You can find it on the website here: https://shop.obyd.co.uk/b/E8y3z
You’ll find a silent video tutorial below to go with this post — there’s no talking in the video so that it’s easy to follow for everyone, including members of the deaf community and my lovely customers from around the world. You can simply watch and craft along at your own pace. You can watch it by pressing the red play button in the centre of the image
Or you can watch the video on youtube here
This post contains affiliate links. As an Amazon Associate, I earn from qualifying purchases — at no extra cost to you! 💖 This helps support the blog and tutorials
Supplies List for the card:
Here’s what I used to make this project — I’ve included links in case you’d like to use the same materials:
- A4 White Construction Card (for card base) – Available on Amazon
This is my favourite A4 card — lovely heavy GSM so it’s nice and sturdy, perfect for handmade and
fancy fold cards. It also prints beautifully if your printer can handle thicker cardstock.
- Score Board – Find it here
Comes with a handy instruction book for different scores and folds, plus there are lots of tutorials
available online.
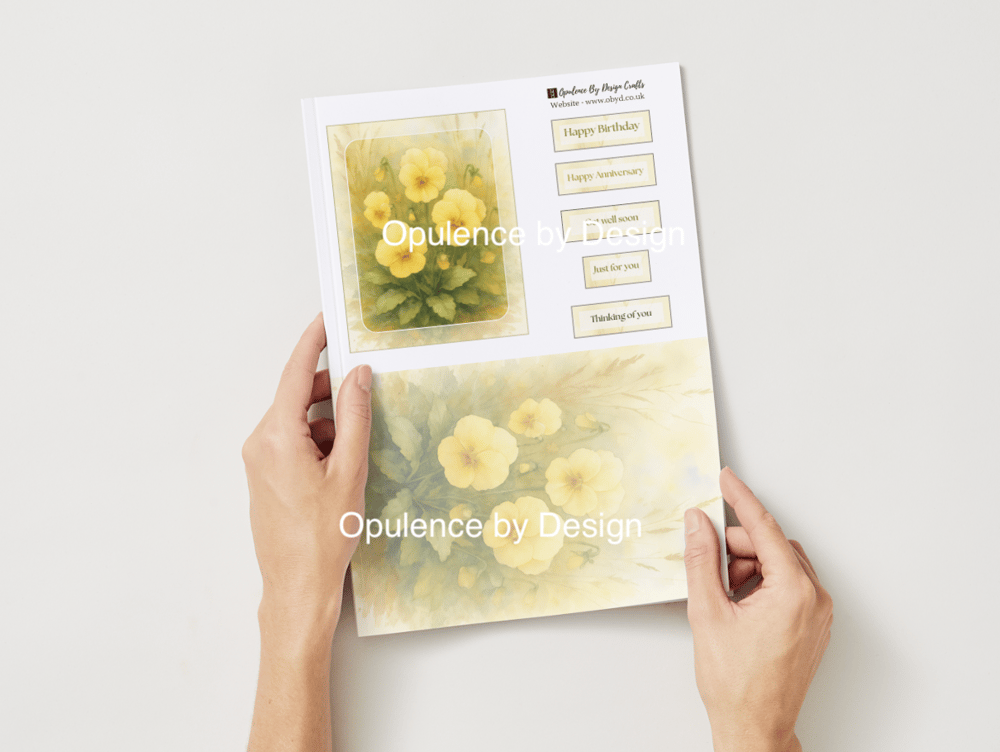
- Pretty Pansy One Sheet Wonder PDF Digital Download
The one sheet wonder includes a topper, backing paper panel, and five sentiments — everything you
need to create a beautifully coordinated card. You can find it on the website here:
https://shop.obyd.co.uk/b/E8y3z
- Glossy Photo Paper – Available on Amazon UK
My go-to paper for printing digital designs — gives a lovely shiny finish that makes colours pop.
- Embossing Folder (Spellbinders) – Find it here
used this to emboss a piece of cream card for texture before layering.
- Gold Mirror Card – Available here
Great value for matting and layering, and adds a touch of elegance to any project.
- Yellow Stickles Glitter Glue – Find it here
- Liquid Pearls – Find it here
Step-by-Step Instructions
Step 1 – Prepare Your Card Base
Take your A4 white construction card and score it in half using your score board to create your card base. Burnish the fold with your bone folder/ scoring tool for a crisp edge.
Step 2 – Print Your Design
Download and print the Pretty Pansy One Sheet Wonder onto glossy photo paper. The colours print beautifully and give a soft, shiny finish.
Step 3 – Emboss Your Background
Take a piece of cream card, place it into your Spellbinders embossing folder, and run it through your die-cutting machine. This will create a lovely textured panel for your background.
Step 4 – Trim and Mount
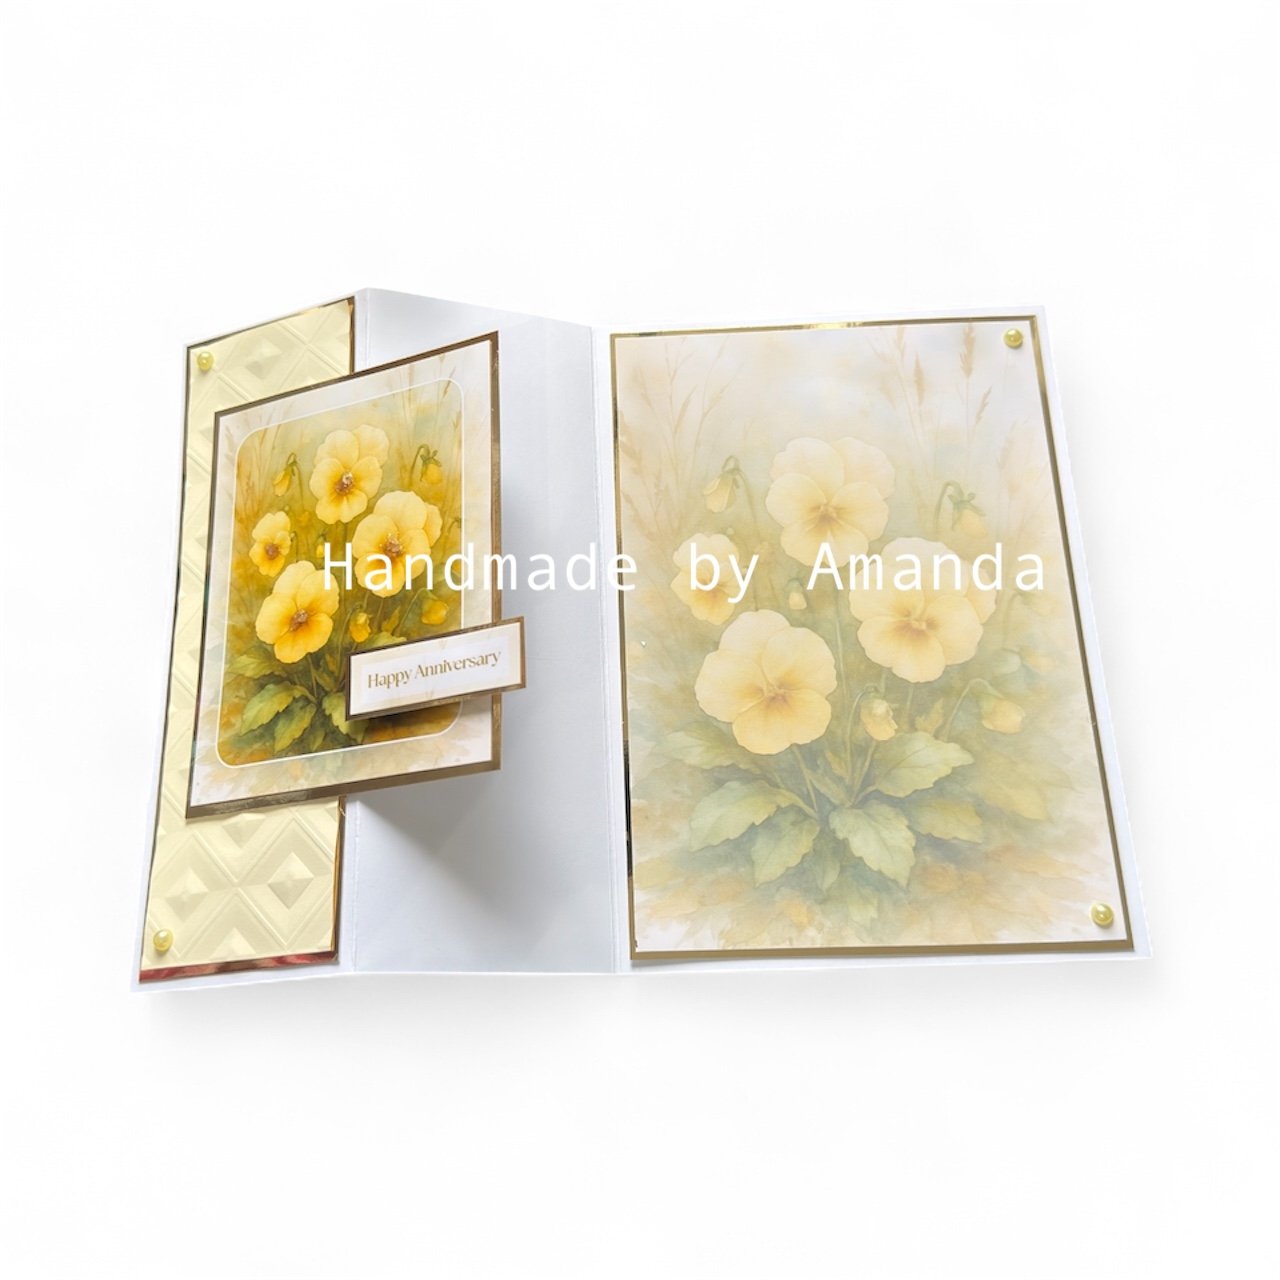
Cut out your topper, backing paper panel, and sentiment from the printed sheet. Mount each piece onto gold mirror card for a polished, layered look.
Step 5 – Assemble Your Card
Layer the embossed cream card onto your card base, followed by the backing paper panel. Then add your topper and sentiment, arranging them however you prefer.
Step 6 – Add Finishing Touches
Use Yellow Stickles and Liquid Pearls to add a few delicate accents — perhaps in the flower centres or around the edges for a touch of shimmer. I popped some gems on from my stash.
Step 7 – Let It Shine
Allow everything to dry fully before standing back to admire your finished card. The result is a bright, cheerful pansy design that’s flat enough for easy posting but still beautifully detailed.
💖 Happy Crafting Amanda xo
If you would like to see more of our designs, blog posts, craft kits/ books, digital downloads or our social media pages such as Instagram, Twitter, Tiktok, Pinterest you can find all of the links on ourLinkTree page here: https://linktr.ee/opulencebydesign or on our website here: www.obyd.co.uk
Comments
Post a Comment