🌼 Create a Stunning Daffodil Bouquet Tea Bag Folded Card – Step-by-Step Instructions Included! 💛
☀️ Well… what a morning! ☀️
I’ve been up for a few hours already working on some new designs and getting everything ready for today's exciting launches . When I got up, it was absolutely glorious — blue skies, sunshine… so I quickly popped some bedding in the wash to get it out on the line. And guess what? 🤦♀️ Now it’s done and it's raining! 😂 Typical, right?! Looks like it's going to be one of those days haha!
Anyway… I’m super excited for you to see today’s brand new sheets and samples — I hope you love them as much as I do!
Wishing you all a lovely day (and fingers crossed the sun comes back out! 🤞☀️)
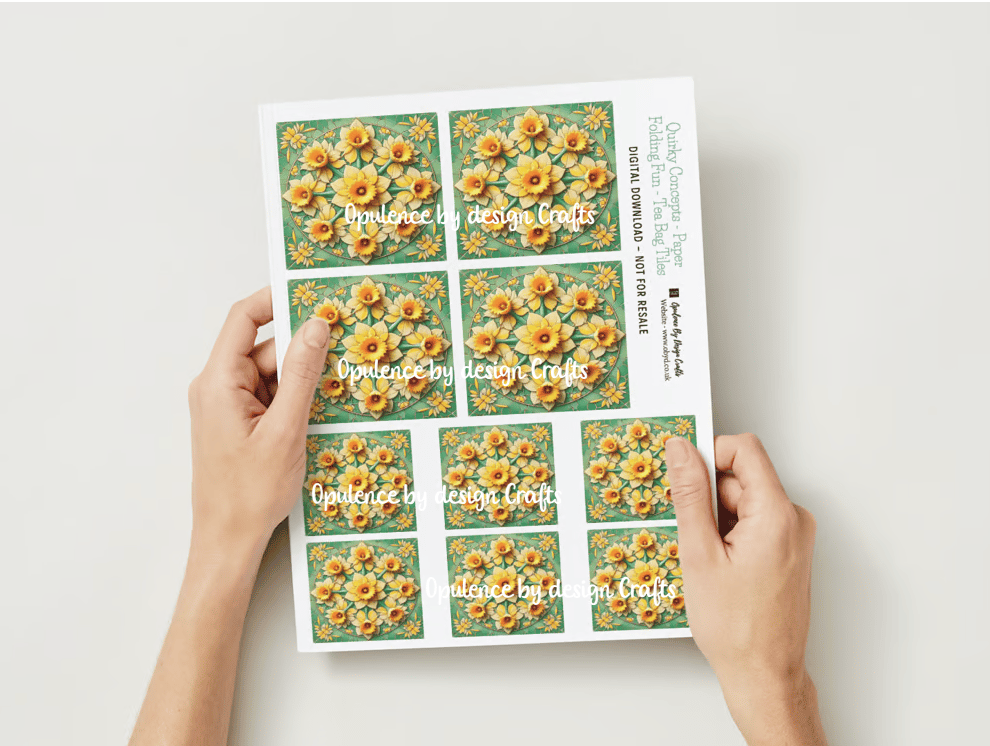
🌼✨ Introducing my BRAND NEW Tea Bag Tile Sheet! ✨🌼
You can find it on the website here: https://shop.obyd.co.uk/b/YlfIZ
I'm so excited to share my latest design with you — Quirky Concepts - Paper Folding Fun - Tea Bag Tiles Sheet PDF Digital Download - Daffodil Bouquet 💛
This fresh and spring-inspired sheet is absolutely perfect for creating beautiful tea bag folded toppers for your cards, tags, and craft projects! Whether you're making something special for Easter, Mother's Day, birthdays, or just to brighten someone's day, these pretty daffodil-themed tiles will add such a cheerful touch to your makes!
💛 Available as an instant download now on the website
💛 Perfect for cards, tags, scrapbook layouts, and more!
💛 Add some beautiful folded florals to your projects 🌼
💛 Decorate boxes and Gift Tags
This is the card i made for the launch sample

** Disclosure: As an Amazon Associate, I may earn a small commission if you make a purchase through my UK Amazon affiliate links. This comes at no extra cost to you but helps support my work.
Supplies List
5x5 hammered pre-scored card blank
The green backing paper can be found here: https://shop.obyd.co.uk/b/Wc7si
The tea bag topper was made with this tile sheet - https://shop.obyd.co.uk/b/YlfIZ
The Easter sentiment can be found here: https://shop.obyd.co.uk/b/SrfYP
I printed the tile sheet out onto my favourite printing paper for tile sheets - https://amzn.to/4hj5JLT this super smooth 120 gsm is perfect for giving nice detailed print outs whilst being supple to fold at the same time and it is amazing value for money for 250 sheets.
You will need something to help make the fold lines a Bone folder is perfect and this one is great value for money: https://amzn.to/4kIgwSL
Trimmer: this is the one i use - https://amzn.to/3FjEy6y
Tape Pens: https://amzn.to/3XGboEQ
Adhesive: This is personal preference but i like to use a glue gun for instant hold.
This tea bag fold is one of the most simplest ones to do and assemble
If you're brand new to Tea Bag Folding, don't worry!
You may find it really helpful to watch my little video tutorial on youtube here: https://www.youtube.com/watch?v=nYV4j81h6Y8
This will walk you through the folding step-by-step and help you see exactly how it comes together.
But if you prefer written instructions, don't worry — I've got you covered below!
Step-by-Step Instructions to Create Your Tea Bag Folded Topper
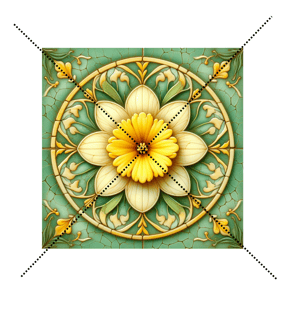
Step 1: Cut Out Your Tiles
- Print and Cut out the 4 larger square tiles from your sheet.
- These will be the tiles you fold to create your topper.
Step 2: Create the Fold Lines
- Place one tile on your work surface print side up, with the points at the top and bottom like a diamond shape.
- Bring the bottom point to the top point, creating a triangle.
- Use your bone folder to firmly crease the fold line.
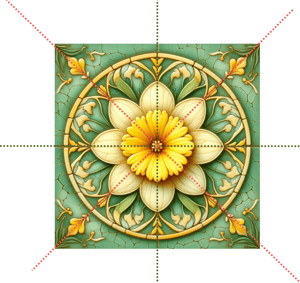
- Open it up.
- Turn your tile 90 degrees and repeat the fold from bottom point to top point.
- Open it up again – you should now have two diagonal fold lines.
Step 3: Fold the Opposite Way
- Turn your tile over so the white side is facing up.
- Place it down in front of you as a square shape (not a diamond this time).
- Fold in half from left to right to create a fold line down the middle.
- Open it up.
- Rotate it 90 degrees and fold in half again from top to bottom.
- When you open it up, you will now have 4 clear fold lines (2 diagonals and 2 straight across).
Step 4: Collapse the Tile Into a Folded Square
- Turn your tile back to the patterned side up.
- Hold the bottom left corner with your left hand and the top right corner with your right hand.
- Gently push the sides in – the fold lines will want to come together and the tile will naturally collapse into a small square folded tile.
- Smooth down all the edges to make it crisp.
Repeat Steps 2-4 for all 4 tiles.
Step 5: Create the Inner Folds
- Place your folded tile down in front of you with the inside folds facing up (the part that opens like a little pocket).
- Take the bottom left point (Point A) and bring it to the centre (Point B) to create a fold along the dotted yellow line
- Firmly crease that fold.
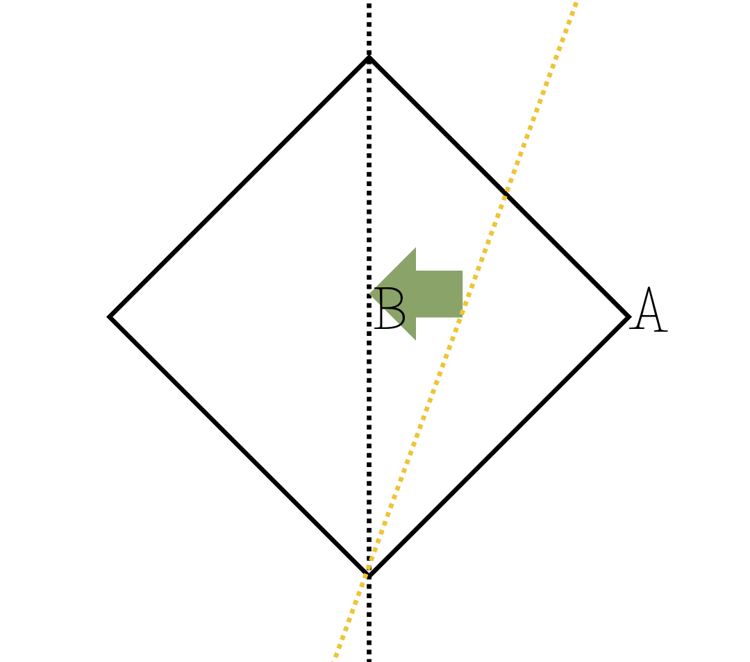
4.)Repeat this fold on the other side by bringing the bottom right point into the centre.
5.)Your tile will now have two little folded sides giving it dimension.
6.)Repeat this step for all 4 folded tiles.

Step 6: Cut Your Card Base
- Cut yourself a 9cm square piece of card.
- This will be the base you build your folded tile topper on.
- I like to do 9cm square as it gives me a bit of wiggle room if I want to trim it down later.
Step 7: Assemble Your Topper
- Visualise your square card base as a pie with 4 quarters.
- Start by gluing 2 of your folded tiles onto opposite corners, ensuring the points face outward.

3. Leave a nice bit of white space around them to create a clean border for your topper.
4.Once those 2 are glued down, glue the remaining 2 tiles in the remaining corners, still leaving a white border.
5.Once you're happy with the placement, glue everything down securely.
Step 8: Finish Your Topper
- Once glued, you’ll see a beautiful dimensional layered effect in the centre of your topper.
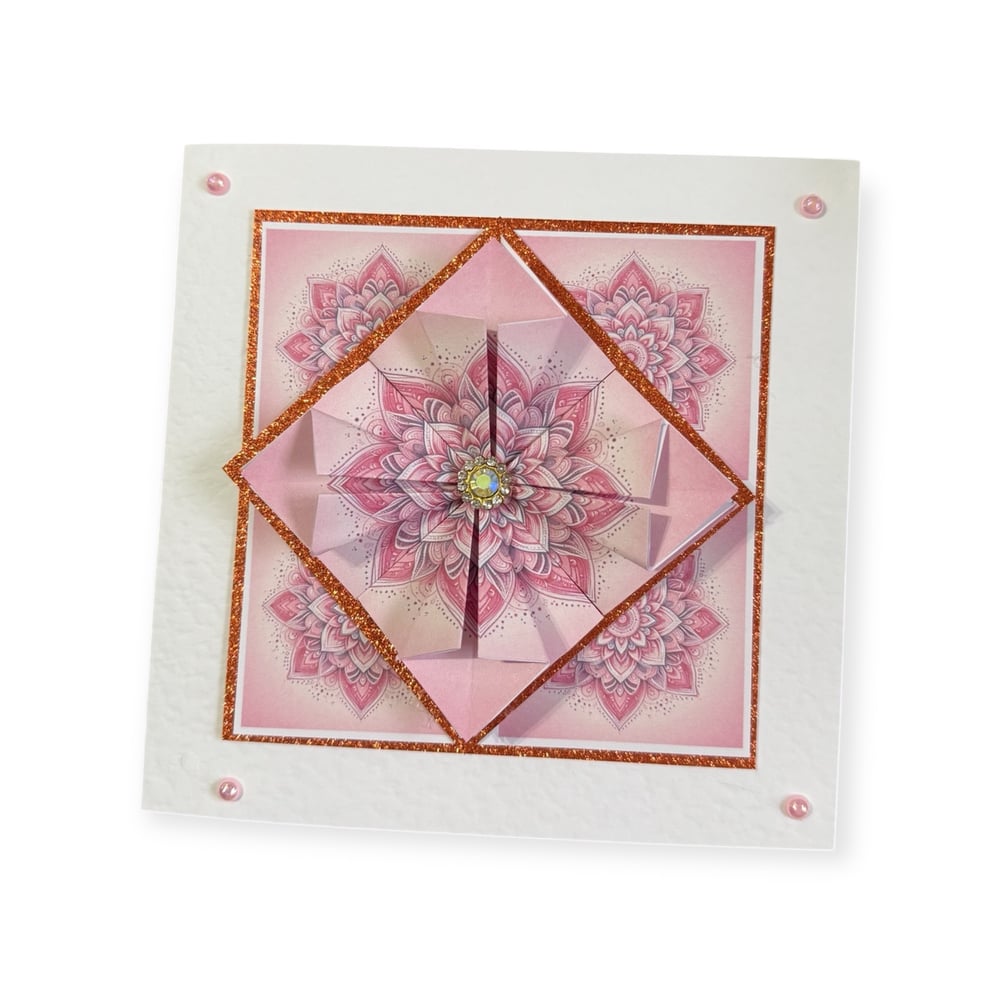
- You can now add a centre embellishment like a gem, pearl, flower, or button to give your topper a finished look.
- If you want, you can mat and layer your topper onto glitter card, mirror card, or patterned paper to really make it pop.
✨ And that's it – you've now created a stunning Tea Bag Folded Topper! 💕 It's up to you if you want to use the topper as a square as shown here
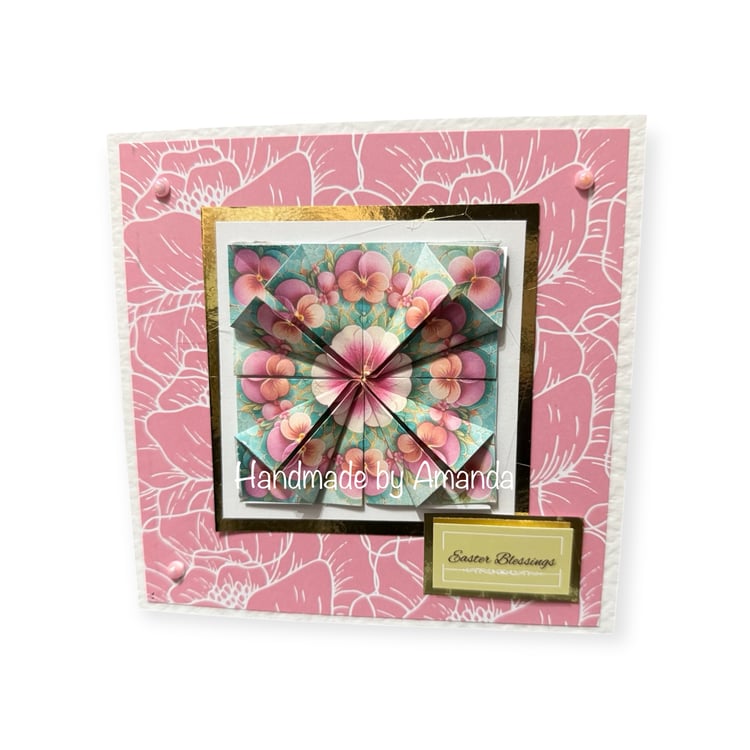
or in a diamond orientation as shown here:
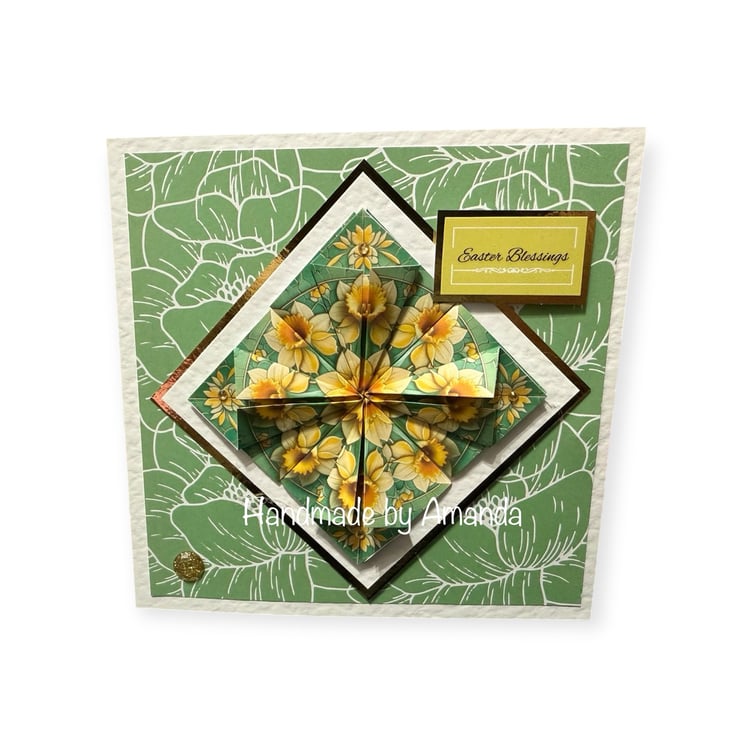
decorate as you like with gems, ribbons and a sentiment
If you like these tea bag tiles sheet i have a whole category set up on the website for them - you can find it here
Thank you for reading xo
Facebook group -  https://www.facebook.com/groups/672573406875861
Facebook page - https://www.facebook.com/OpulenceByDesign/
Blog - https://shop.obyd.co.uk/blog/opulence-by-design-crafty-corner-blog
Download Shop - https://shop.obyd.co.uk/
Website - www.obyd.co.uk
Amazon - my cut and craft printed kit / books for those that prefer a physical item to craft with rather than download - Cut and Craft books
For all of our social media accounts you can find the links here: https://linktr.ee/opulencebydesign
If you have Pinterest i would greatly appreciate a follow as i have spent weeks adding lots of card samples to my various boards - Cardmaking ideas, Christmas crafts, My Crafty Blog board and others so it would be awesome if you could pop over and show it some love - Pinterest Boards
Comments
Post a Comment