More tea bag folding ideas, styles, sheets blog post Plus the Rounds not Squares
Happy Tuesday Crafty friends!
More tea bag folding techniques, ideas and sheets..
I asked the question the other day about what style everyone prefers and i got a varied response so i thought i would do a little bit of everything
Sharing todays card and new sheets that we have launched
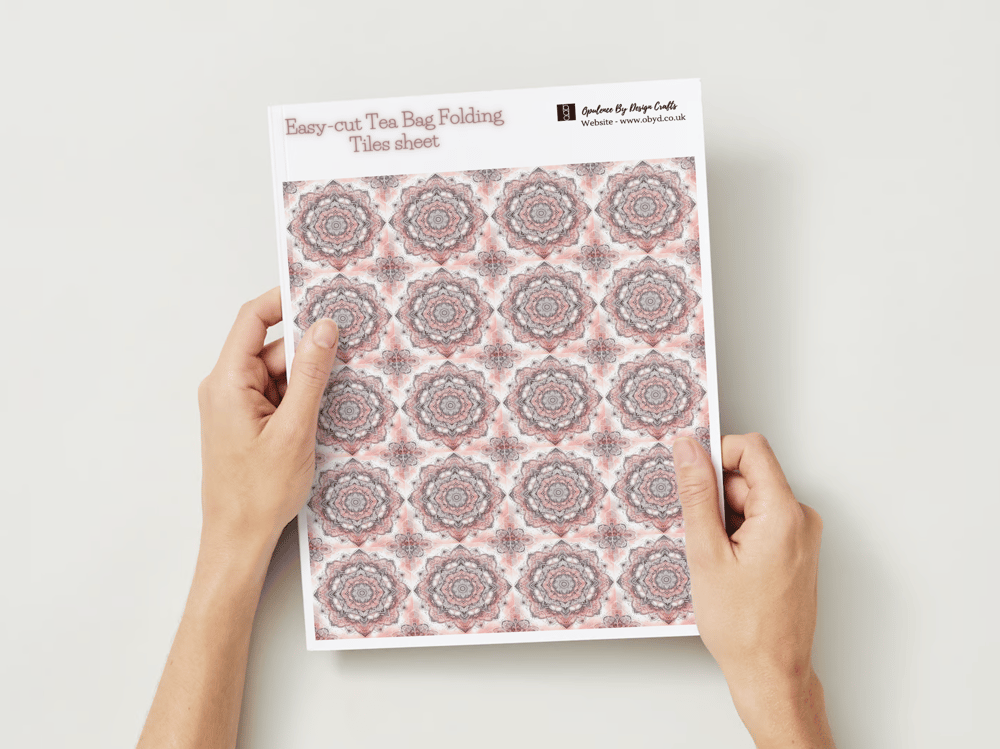
Introducing Our New Easy Cut Tea Bag Folding Tile Sheets!
Discover a new way to add depth and dimension to your papercraft projects with our Easy Cut Tea Bag Folding Tile Sheets. Perfect for cardmakers and paper enthusiasts alike, these sheets are designed to make the intricate art of tea bag folding accessible and fun for everyone!
You can find this one on the website here
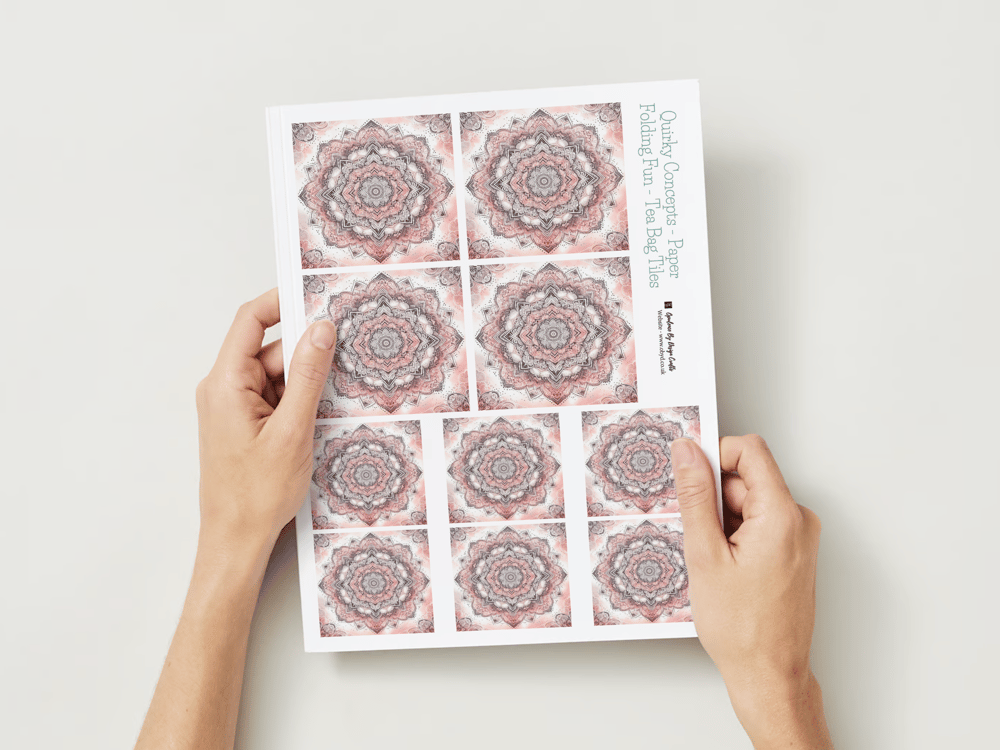
The duo tile sheets offer 2 sized on the one sheet
You can find this one on the website here
Showcasing our NEW - Rounds not Squares Tile Sheet
You can find this on the website here
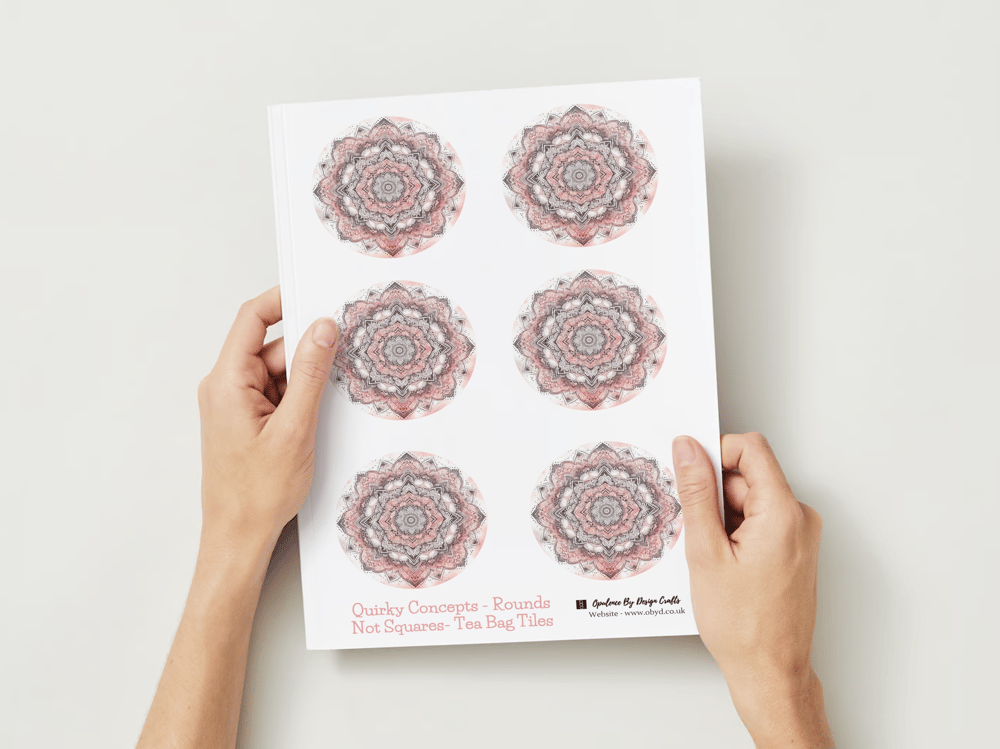
I also created a Background / Card front / Backing style paper sheet that comes in a JPG and PDF File that you can also re-size the sheet to create your own tiles (giving you the background and the design to make your own tiles)

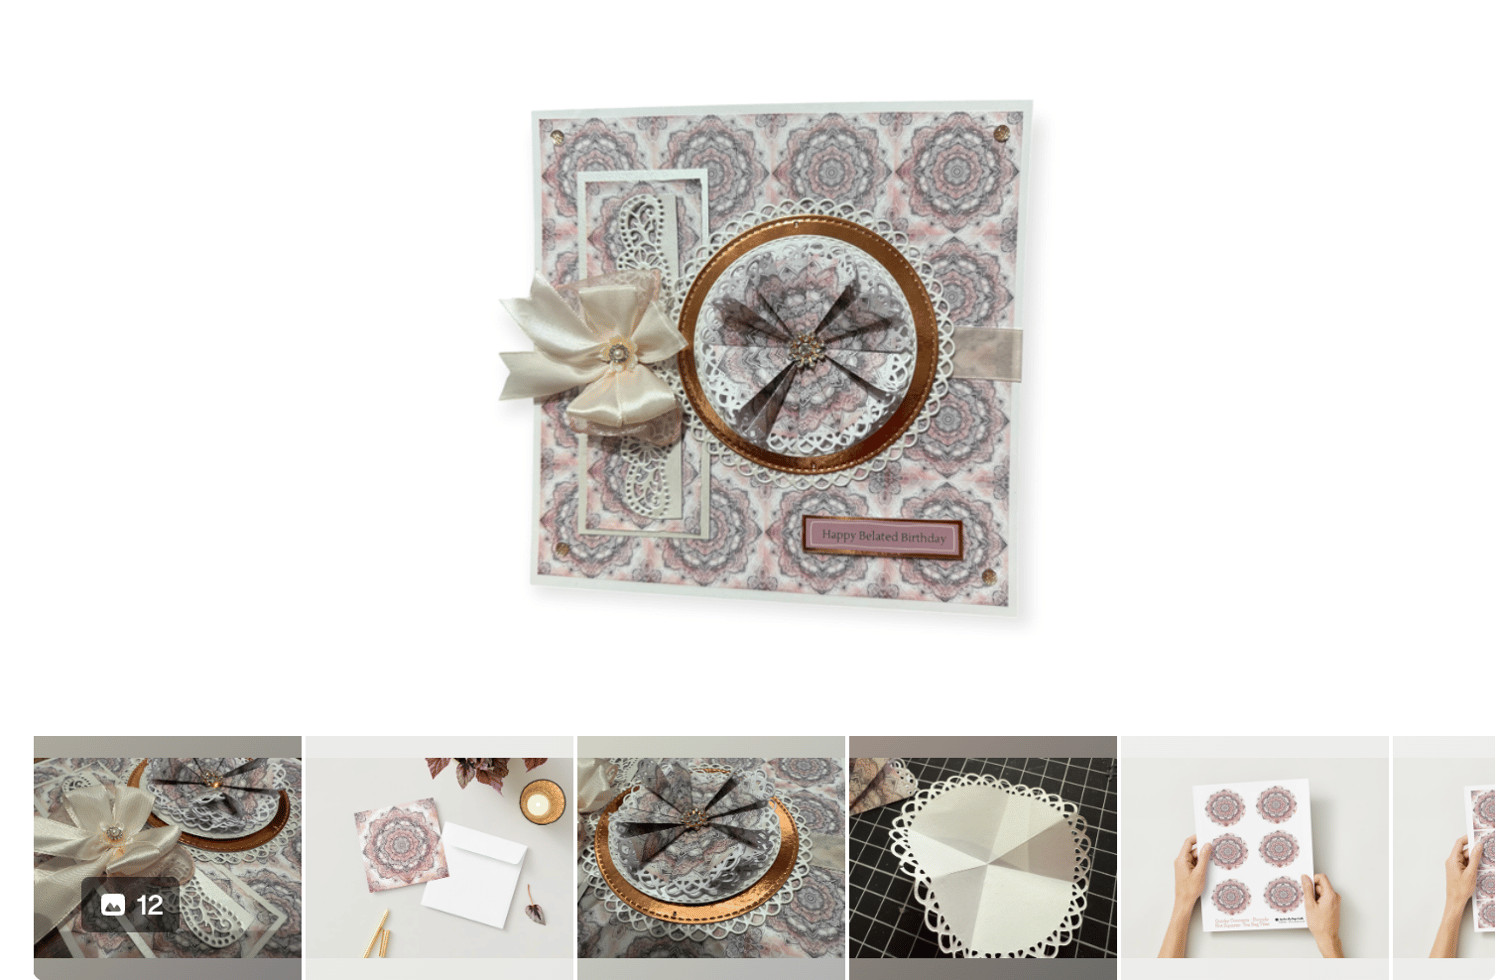
Here is the card i made for the launch of the new Rounds not Square sheet
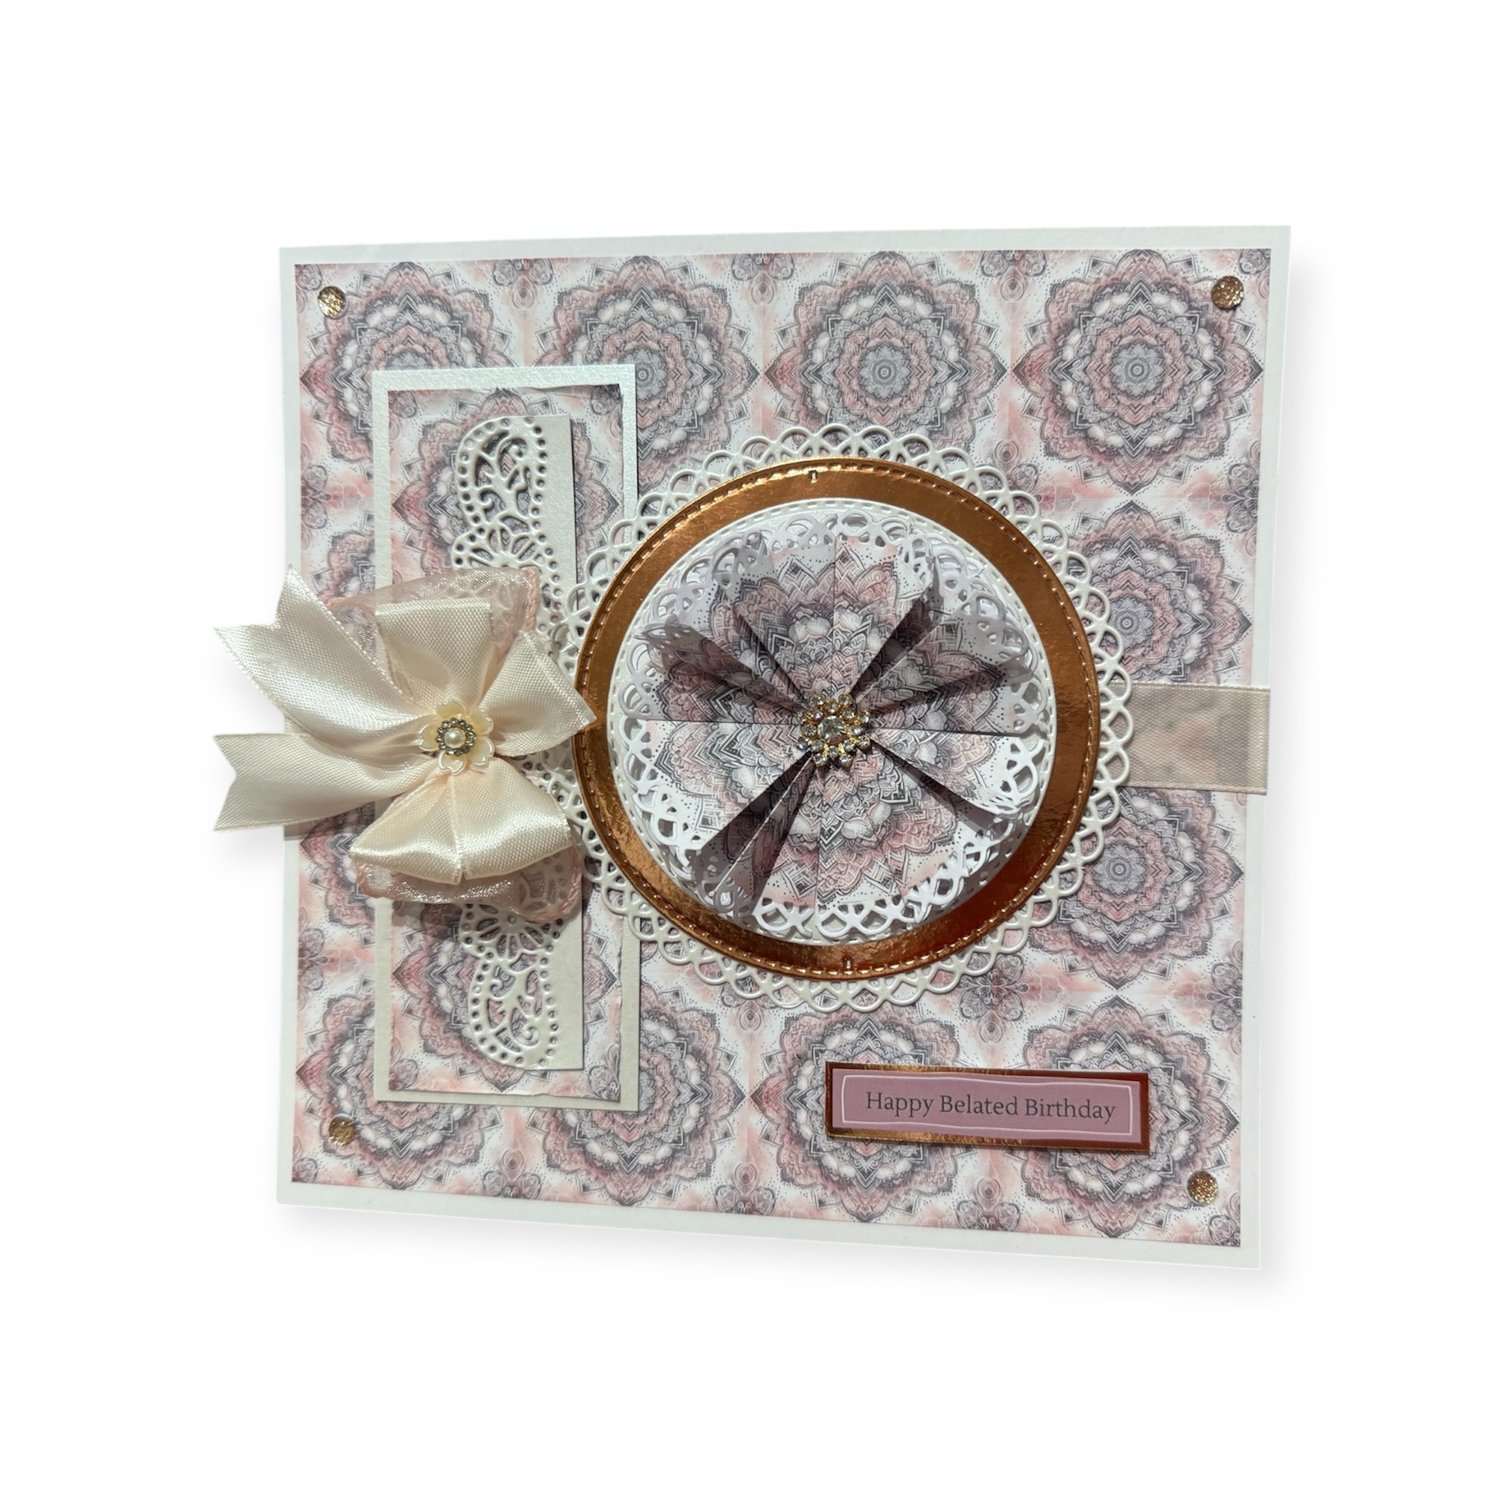
Step-by-Step Instructions for Tea Bag Folding technique with rounds
I know it's often easier to learn by watching, so if you're new to tea bag folding and would like a video tutorial, just let me know—I’d be happy to create one! 😊 the technique is the same as the video i did the other week.. it just looks a little different with "rounds"
I used the Easy Cut Tile sheet as the background and for the panel
I used the Rounds not Squares to make the tea bag tiles
These sheets were printed onto 120 gsm super smooth paper
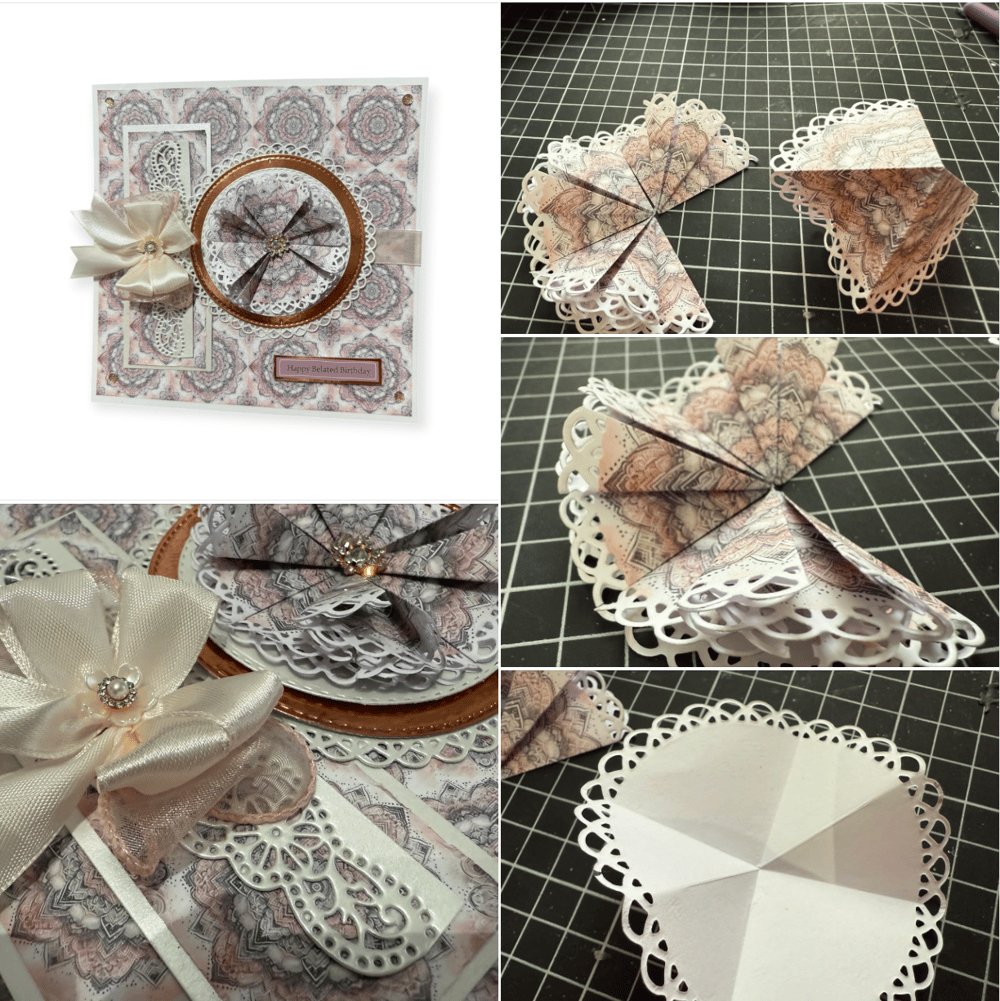
How to Fold the Shape
1️⃣ Cut Your Shape
- Use a loopy edge die to cut out a round shape (you can use a straight edge - i just like the frilly doily style edge this style of die gives.
2️⃣ First Fold
- Fold the circle in half and press firmly.
- Use a bone folder to score the crease for a sharp fold.
3️⃣ Second Fold
- Open the circle back up.
- Fold it in half again in the opposite direction to create four equal quarters (like a pie).
4️⃣ Create the Wedge Shape
- Gently persuade the sides inward to form a wedge shape (like a cartoon wedge of cheese).
5️⃣ Final Fold
- Fold the outer edges inward towards the centre to create the final shape
It takes 4 of these to make up the topper - you arrange them back as the 4 pieces of pie shape and glue in place matching the lines up.
You can find all of the tea bag folding related sheets and kit on the website here
I did a little video on a blog post the other week if you missed it and you would like to see it you can find it here: https://shop.obyd.co.uk/blog/opulence-by-design-crafty-corner-blog/free-tutorial-quirky-concepts-paper-folding-fun-basics-tea-bag-folding-tutorial
For more crafty inspiration check out our:
Facebook group - https://www.facebook.com/groups/672573406875861
Blog - https://shop.obyd.co.uk/blog/opulence-by-design-crafty-corner-blog
Download Shop - https://shop.obyd.co.uk/
Website - www.obyd.co.uk
For all of our social media accounts you can find the links here: https://linktr.ee/opulencebydesign
If you have Pinterest i would greatly appreciate a follow as i have spent weeks adding lots of card samples to my various boards - Cardmaking ideas, Christmas crafts, My Crafty Blog board and others so it would be awesome if you could pop over and show it some love - Pinterest Boards
Thank you for looking, happy crafting as always! A xo
Comments
Post a Comment