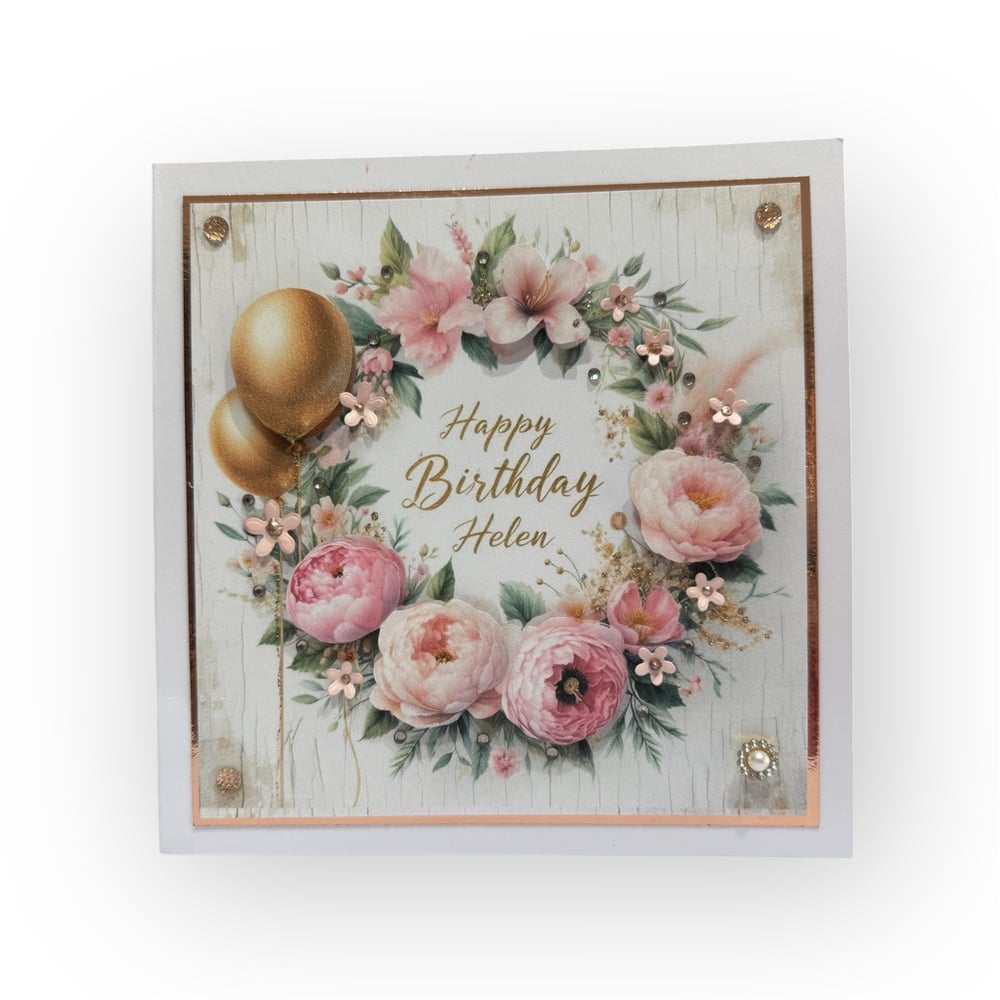
Sharing my little handmade card
* Disclaimer
The links to Digital Downloads are my own digital download products from my website -https://www.obyd.co.uk/
** Also as an Amazon Associate i may receive a small referral commission should you buy something through my UK Amazon affiliate links
Supplies List
The Helen "Named" Cardmaking topper sheet can be found here: https://shop.obyd.co.uk/b/BtX9g
You can find all names sheets here in their special category on the website here
5x5 Cardblanks from Craft Uk - https://amzn.to/4j6gbc1
Rose Gold Mirror Card from Dovecraft - https://amzn.to/42cQ4tU
Sue Wilson's Pale Pink Card from Creative Expressions - https://amzn.to/4jaUc3z
The small flowers were punched using some small flower punches
The centres of the punches have nuvo drops from Tonic Studios in the centre - https://amzn.to/3PyE2n2
I added stickles to add some golden sparkle to the design topper sheet - https://amzn.to/3PxA6CV
The gems are from my stash
I used my favourite Crafters Companion tape pen to glue down my paper and card layers - https://amzn.to/4gSM3z2
How to Create a 3D Decoupaged Effect on Your Card - whilst you can certainly just use this as they are and create flat cards i thought it would be a fun little project to show how easy and versatile these sheets are but doing a spot of decoupage.
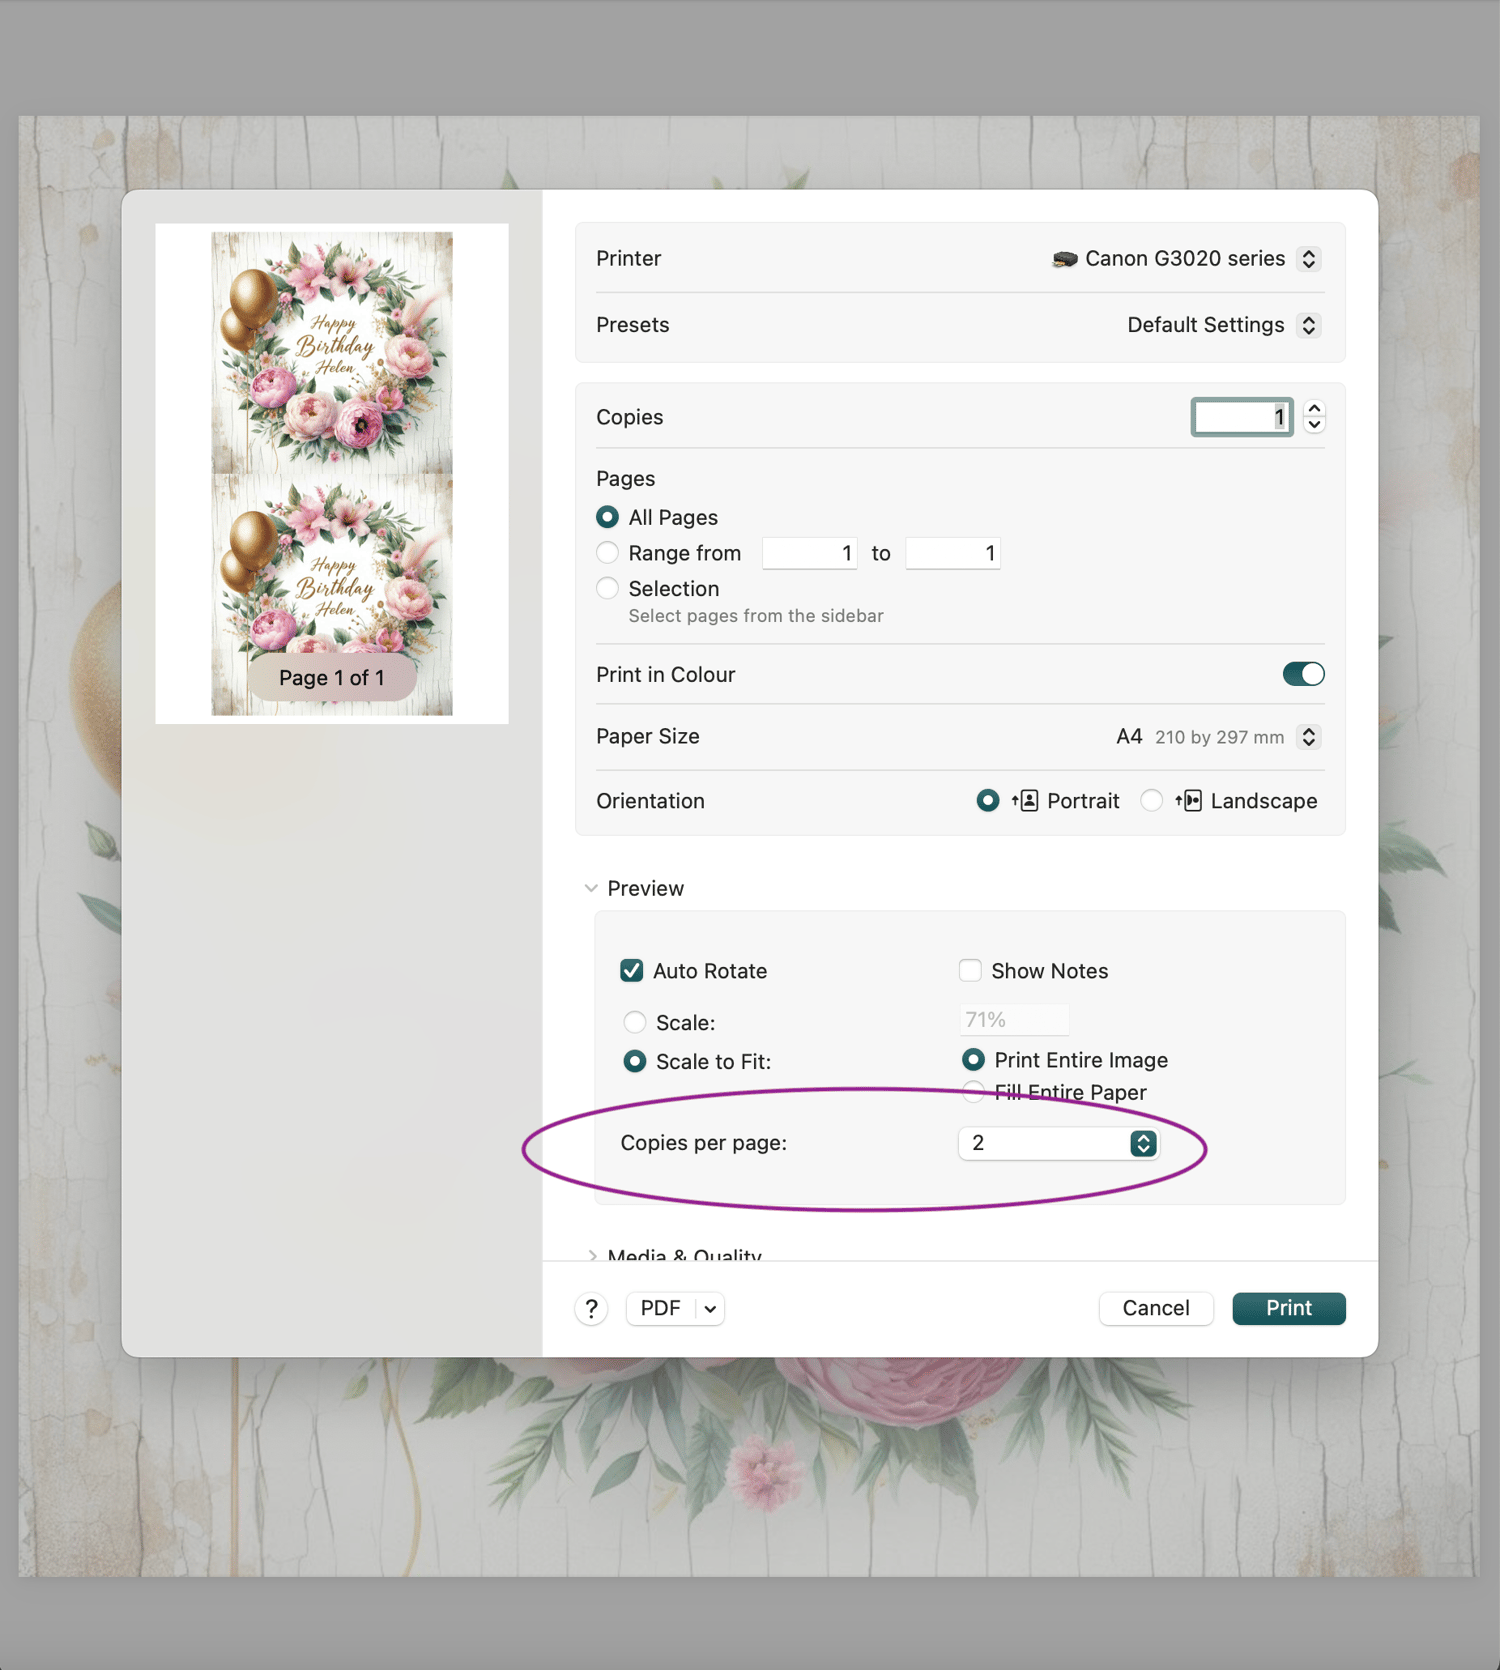
Adjust Printer Settings
- Open your design file and adjust your printer settings to print 2 copies to the page.
- This size works perfectly for the 5x5 Card blank and allows a little wiggle room for some matting and layering
Your printer settings are a powerful tool to help you get the most out of your crafting projects. By adjusting these settings, you can resize your designs, choose different printing mediums (like cardstock or photo paper, acetate or vellum), and ensure the "Best" quality option is selected for sharp, vibrant prints. The settings page is your best friend in your crafting arsenal—spend a little time exploring it to discover features like borderless printing, scaling, or even custom colour adjustments. These small tweaks can make a big difference in the quality of your final creations! and help you get more out of your images.
Prepare the Base Layer
- Take one of the printed toppers and cut it down to fit as the main card front. I allowed for a nice layer of copper mirror card to make the topper "pop"
- Adhere the layers to the card blank securely using double sided tape or a tape pen
Create Decoupage Elements
- From the second printed topper, carefully cut out specific elements you want to layer
- Choose some of the larger flowers or the top balloon from the design.
Layer the Cutouts
- Using foam pads or adhesive dots, layer the cut-out elements directly over the corresponding areas on the base topper.
- This creates a raised, 3D effect, giving your card extra depth and dimension.
Finish Your Card
- Add any additional embellishments or details as desired.
- Your 3D card is now ready to impress!
This method is simple yet effective for creating stunning decoupaged cards.
You can find all names sheets here in their special category on the website here I will be doing more of these but if there is a specific name you would like doing you can send me a name request on the website here using our enquiry form on the website
I hope you have liked looking at today's little project i really enjoyed making it and typing up the supplies list for you. *** Please note that the craft supplies links for the products are from Amazon UK - all items were in stock at the point of writing this blog. If you are reading this in the future and the link doesn't work it is probably because the item has sold out.
Always feel as though you can reach out to me if you can't find something i am more than happy to help you try and find it or at least something very similar. Or if you are not in the UK.
You can always message me through facebook - https://www.facebook.com/OpulenceByDesign/
Thank you for reading today's post
For more crafty inspiration check out our:
Facebook group - https://www.facebook.com/groups/672573406875861
Facebook Page - https://www.facebook.com/OpulenceByDesign/
Blog - https://shop.obyd.co.uk/blog/opulence-by-design-crafty-corner-blog
Download Shop - https://shop.obyd.co.uk/
Website - www.obyd.co.uk
For all of our social media accounts you can find the links here: https://linktr.ee/opulencebydesign
If you have Pinterest i would greatly appreciate a follow as i have spent weeks adding lots of card samples to my various boards - Cardmaking ideas, Christmas crafts, My Crafty Blog board and others so it would be awesome if you could pop over and show it some love - Pinterest Boards
Thank you for looking, happy crafting as always! A xo
Comments
Post a Comment