
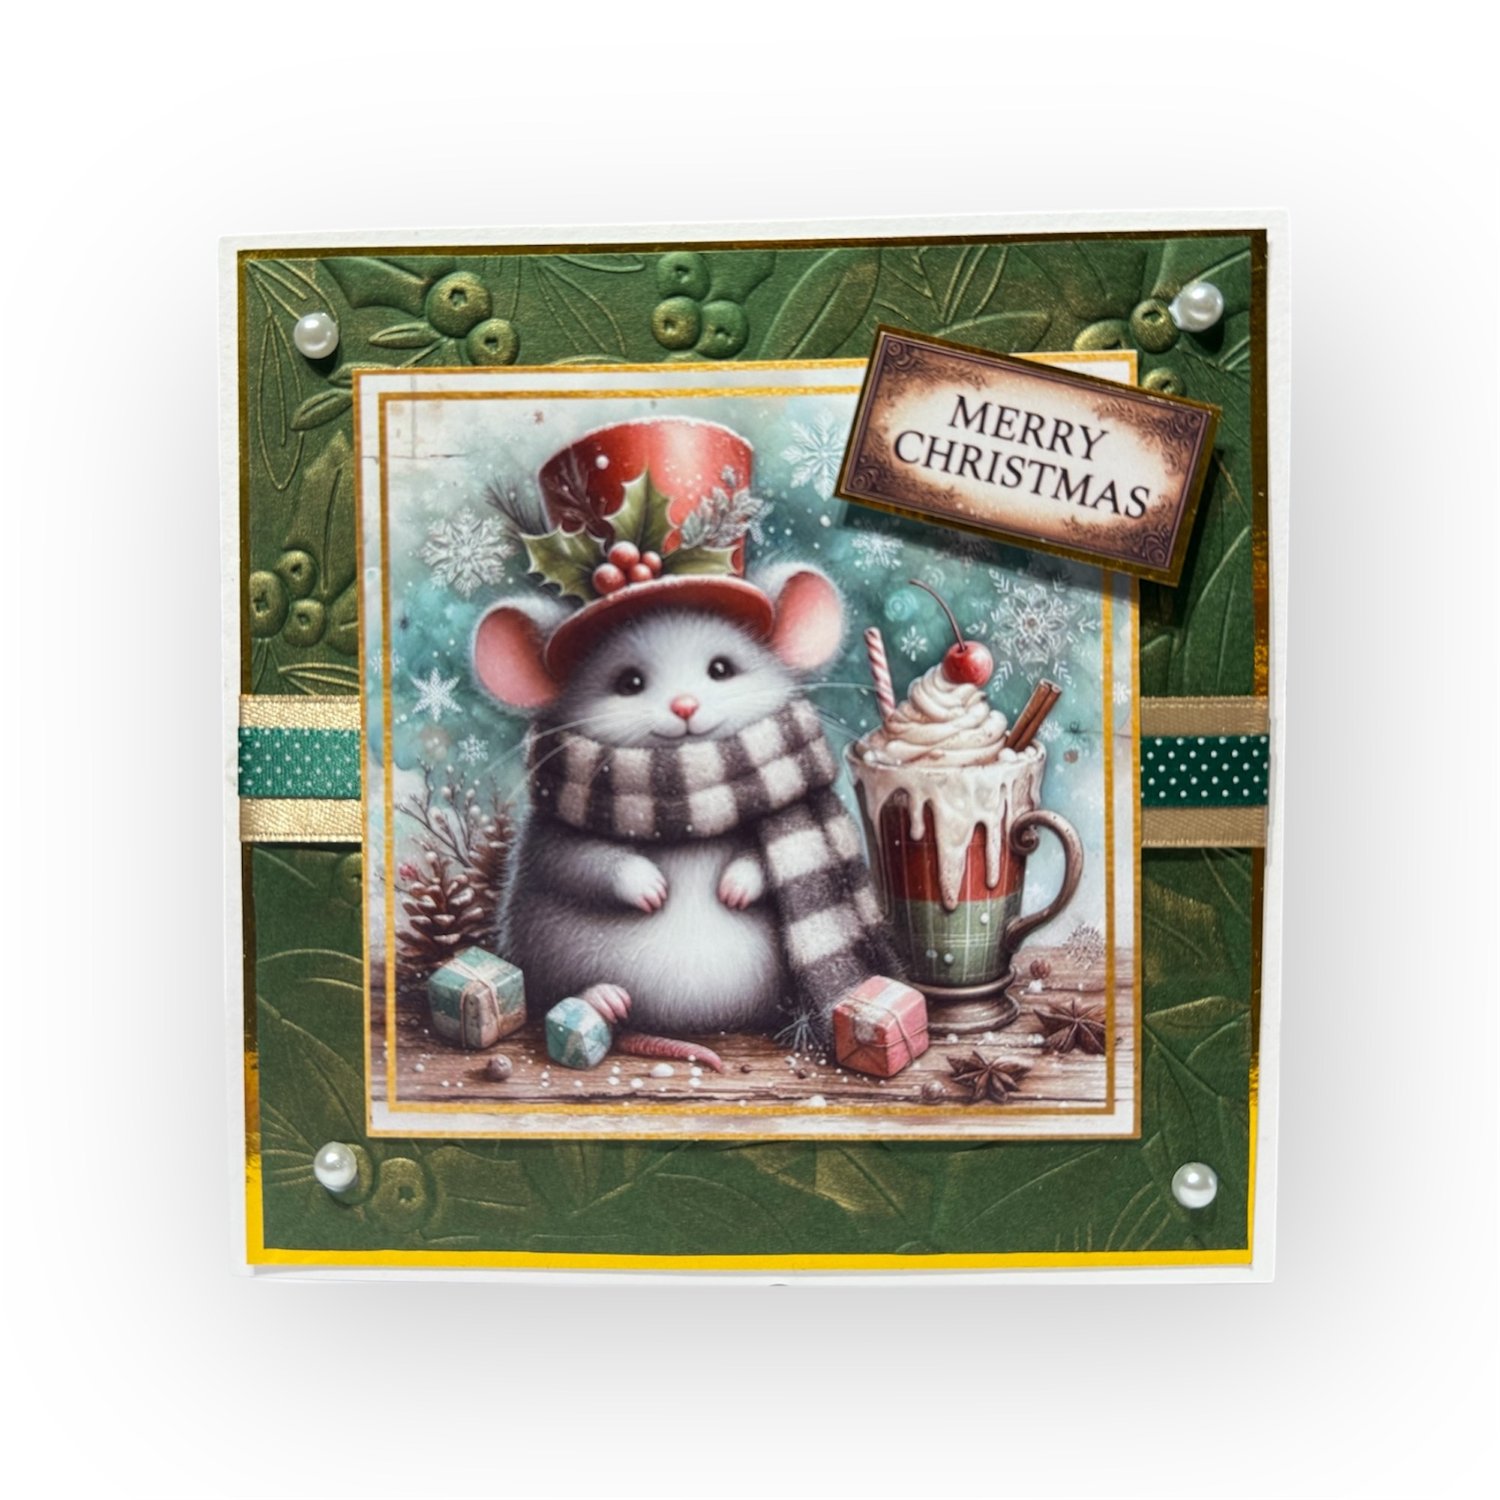
Whisker the Mouse Christmas Card with step by step instructions
🎄 Happy Monday! Sharing My Whisker the Mouse Christmas Card 🎄
Happy Monday, friends! I hope you’re all doing well and had a wonderful weekend. For my friends in the UK, I hope you stayed safe during the wild weather brought by Storm Bert—what a blustery few days it’s been! Hopefully, you’re all snug and dry as we head into the week.
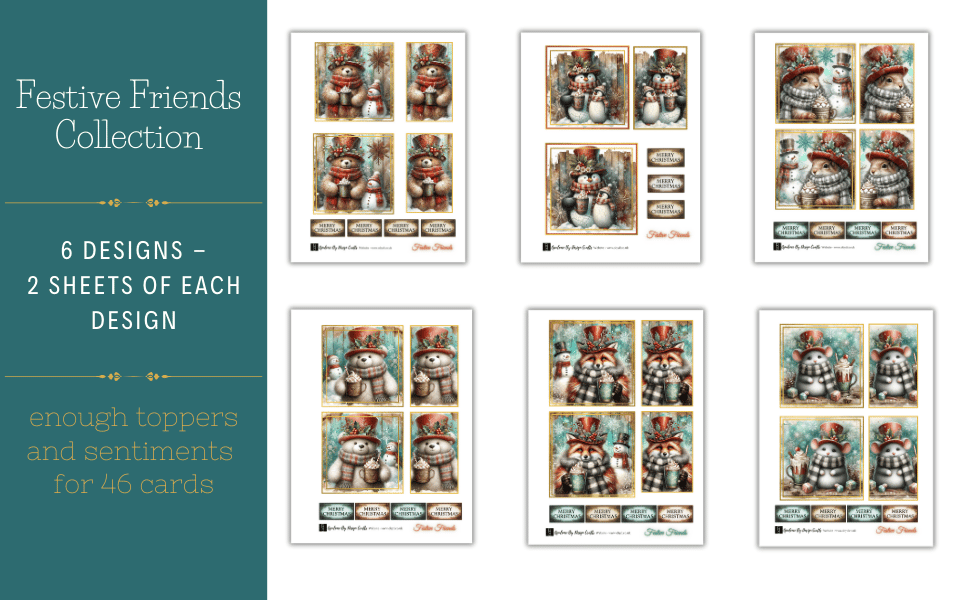
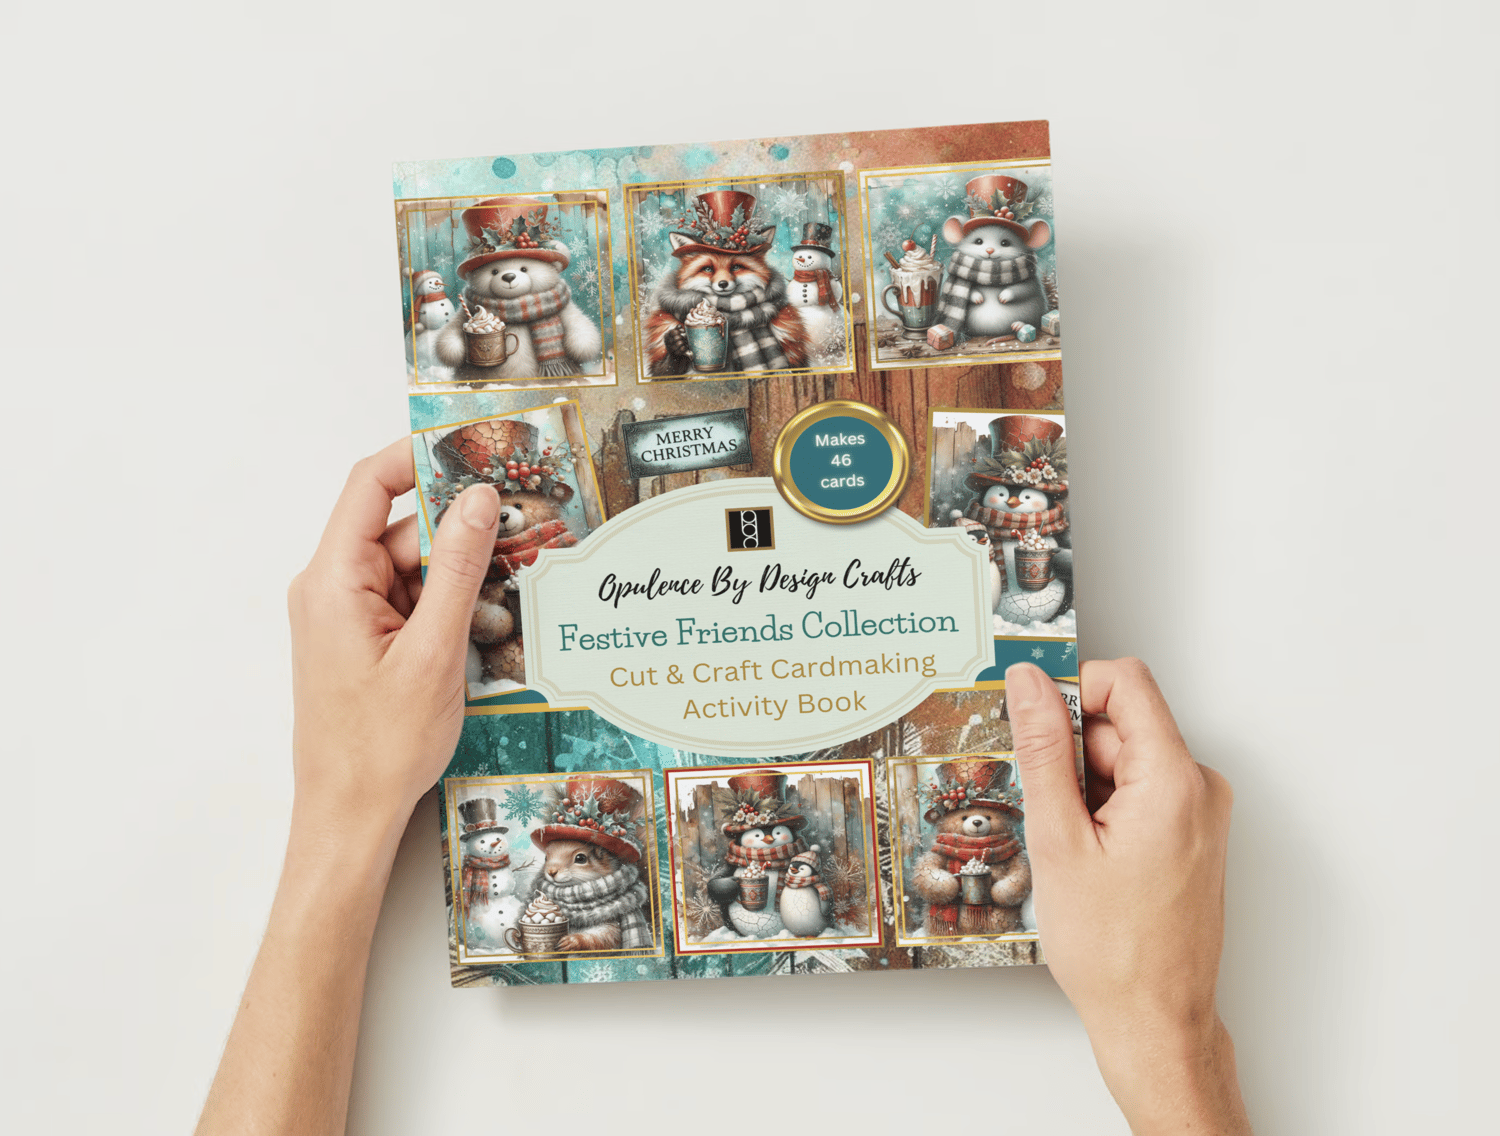
Last night, I spent some cozy time in my craft room working on a Christmas card featuring Whisker the Mouse, one of the adorable characters from the Festive Friends collection. With a few Christmas card orders coming in for these charming designs, I thought it would be the perfect opportunity to share this little project with you!
* Disclaimer
The links to Digital Downloads are my own digital download products from my website -https://www.obyd.co.uk/
** Also as an Amazon Associate i may receive a small referral commission should you buy something through my UK Amazon affiliate links
Whisker the Mouse Christmas Card
I absolutely love creating with the Festive Friends characters. Whisker the Mouse, with his long Whiskers and festive scarf, has such a warm and nostalgic feel, and he appeals to crafters and card recipients of all ages. There’s just something magical about him!
Supplies List for the card:
Option 1.) Festive Friends Collection - The Whisker the Mouse topper and sentiment digital download -https://shop.obyd.co.uk/b/CSR5f
(you can find all of the Festive Friends Digital Download sheets here on the website)
Option 2) For those that don't have access to a printer or prefer to craft with physical products
It it also available in the Cut and Craft Book which is available worldwide on amazon - https://amzn.to/3CSs3NQ
- The topper sheet was printed onto my favourite new photo paper you can find it on amazon here
- Spellbinders Embossing Folder - https://amzn.to/4hXwszn
- Gold ink pad for running over the embossed card - Versacolor - https://amzn.to/3AMin7f
- Gold mirror card - https://amzn.to/3Z7zVCV
- 300gsm 5"x5" Hammered Cardblank - https://amzn.to/498jk6d
- Stickles for a touch of glitter - I used "Star Dust" but you can find lots of colours on amazon here
- Faux Pearl flat backed gems bundle - https://amzn.to/4eNbsIT
- Ribbon used - from my stash
How to Make a Whisker the Mouse Festive Card with Glitter Accents
This easy-to-follow guide will show you how to create a beautiful handmade Christmas card featuring Whisker the Mouse from the Festive Friends collection. With glittery accents and classic festive charm, it’s perfect for spreading holiday cheer!
Supplies Needed
Option 1: Digital Downloads
- Whisker the Mouse Topper & Sentiment from the Festive Friends Collection: Get it here
- Printer and photo paper (I recommend this one on Amazon).
Option 2: Physical Products
- Festive Friends Cut and Craft Book, available on Amazon: Shop Here.
Additional Supplies:
- 5"x5" hammered card blank (300gsm): Shop Here.
- Gold mirror card: Shop Here.
- Spellbinders embossing folder: Shop Here.
- Gold ink pad: Versacolor Ink.
- Stickles glitter glue in "Star Dust" or any festive shade: Shop Here.
- Faux pearl flat-backed gems: Shop Here.
Step-by-Step Instructions
Prepare the Card Base
- Start with a 5"x5" hammered card blank for a sturdy and textured base.
Create the Background Layers
Cut the Gold Mirror Card Layer:
- Measure and cut a square of gold mirror card slightly smaller than the card base, leaving a narrow border around the edges when attached.
Emboss the Card Layer:
- Use the Spellbinders embossing folder to create a beautifully textured layer from plain green cardstock.
Highlight the Embossing:
- Gently run a gold ink pad over the raised areas of the embossed card to make the design pop.
Attach the Layers:
- Adhere the gold mirror card to the card blank.
- Center and attach the embossed layer on top of the gold card.
Add the Whisker the Mouse Topper and Sentiment
Prepare the Topper:
- Print and cut the Whisker the Mouse topper and sentiment using the digital download, or detach them from the Cut and Craft Book.
Attach with Dimension:
- Use foam pads to mount the Whisker the Mouse topper in the centre of the embossed card.
- Add the sentiment below or beside the topper, also using foam pads.
Add Sparkly Glitter Details
- Use Stickles glitter glue in "Star Dust" to highlight details on the Whisker the Mouse topper, such as:
- His scarf.
- The Christmas ornaments or snowflakes around him.
- Any decorative borders.
- Allow the glitter to dry completely before proceeding.
Add Final Embellishments
- Place a few faux pearl flat-backed gems around the card for an extra touch of elegance.
- Add ribbon across the card, underneath the topper, for added texture and charm (i did a double layer)
Where to Find the Supplies
- All Festive Friends digital downloads: Shop Here.
- Physical Festive Friends Cut and Craft Book: Shop Here.
Adhesives:
Crafters Companion Tape Pens - Pack of 4 - https://amzn.to/3Z2U391
Hunkydory Foam Pads - https://amzn.to/3Z06J0t
My glue gun is an old one the new one is a different colour you can find the new version here: https://amzn.to/4128FZ4
Tools and Equipment:
My Tonic Guillotine can be found here: https://amzn.to/3ZkKZOk i find this perfect for quick cardmaking it is smaller than some on the market so it doesn't take too much space up on my craft desk
My Table protector / Black Craft Mat - You can find all different sizes and colours here: https://amzn.to/3V5f7e0
Enjoy crafting this delightful Whisker the Mouse card! It’s a simple and elegant way to celebrate the season, and its charming design is sure to bring a smile to anyone’s face. 🎄✨
Thank You for Visiting Today’s Blog Post!
Thank You for Visiting Today’s Blog! 🌟
Hello, amazing crafters!
A huge thank-you for stopping by to check out today’s post—I truly appreciate your support and hope you’ve discovered a spark of inspiration for your next crafting adventure. Your visits and kind words mean the world to me! 💖
If you’re craving more creative ideas, tutorials, or resources, here are some great places to explore:
✨ Join the Community – Share your creations and find endless inspiration in our Facebook Group.
✨ Stay Updated – Follow our Facebook Page for the latest launches, sneak peeks, and updates.
✨ Crafty Blog – Dive into a treasure trove of tips and tutorials on the Opulence By Design Blog.
✨ Digital Downloads – Explore printable goodies for your projects in the Download Shop.
✨ Cut & Craft Books – Browse my Amazon author page for all my crafting books: Amanda Aitken on Amazon.
✨ One-Stop Shop – Find everything you need on the Opulence By Design website.
✨ Linktree Hub – Access all my links in one place here: Linktree.
🌟 Pinterest Love 🌟
Are you on Pinterest? I’d love for you to check out my boards filled with cardmaking ideas, Christmas crafts, and blog highlights! A follow would mean so much to me. Let’s share the joy of crafting together!
Thank you for being part of this vibrant community. Here’s to happy crafting and making something beautiful today! 🥰
Happy Crafting as always,
Amanda xo
Comments
Post a Comment