Sharing my Snowy Barn Pyramage, Invertage and Standard Square card and explaining the difference and how to make each of them blog post
Sharing my Snowy Barn Pyramage, Invertage and Standard Square card and explaining the difference and how to make each of them blog post
Happy Wednesday!!
Another beautiful morning up't North, the sky is blue and the sun is shining.
I've just had a look at the webcam on the sea front and it looks like a beautiful morning, the tide is in but the water is so still!!
No time for a walk today but hopefully i will get chance at the weekend.
* Disclaimer
The links to Digital Downloads are my own digital download products from my website -https://www.obyd.co.uk/
** Also as an Amazon Associate i may receive a small referral commission should you buy something through my UK Amazon affiliate links
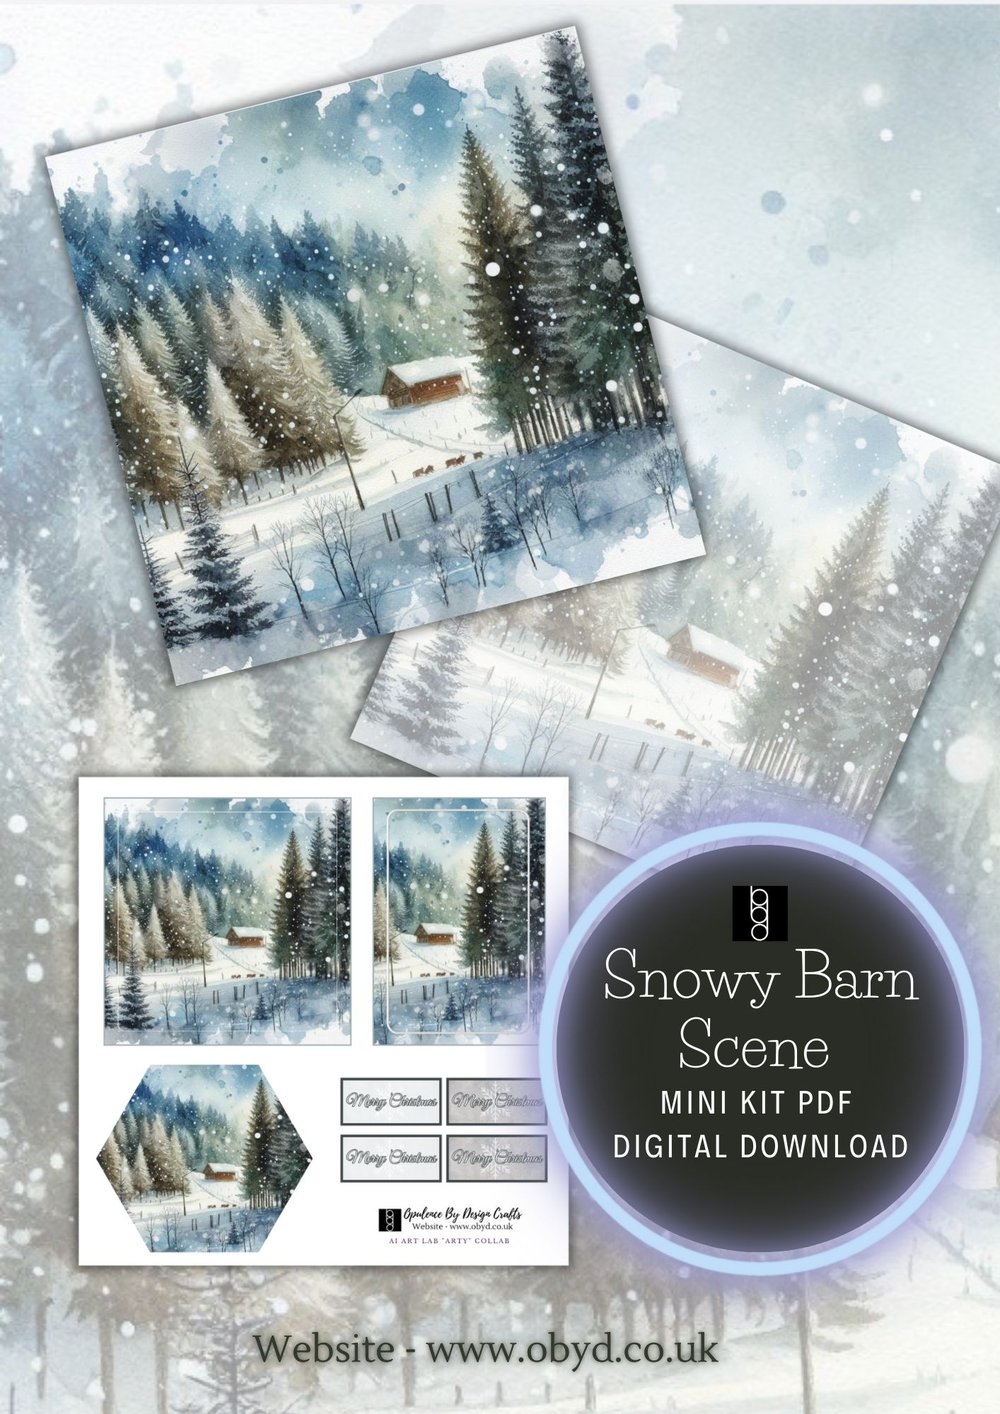
Exciting New Launch: Snowy Barn Scene Mini Kit
Happy to unveil our latest launch: the Snowy Barn Scene Mini Kit in PDF Digital Download format!
This cozy and festive kit contains 3 8"x8" pages, perfectly designed for your holiday crafting needs.
What's Inside:
- Topper Sheet: Includes 3 stunning toppers and 4 "Merry Christmas" sentiments.
- Snowy Barn Paper: A beautiful backdrop of a serene, snowy barn.
- Frosted Snowy Barn Paper: Adds a frosty touch to your winter scenes.
This kit was created for a class a few weeks ago after a request for materials that could be used to create pyramage and invertage effects. The ladies loved it, and I'm confident you will too! It's also perfect for pairing with your die-cut winter animals, thanks to the realistic background design.
I hope you enjoy crafting with this kit as much as I enjoyed creating it.
Ready to start your next masterpiece? Let your creativity shine this holiday season!
You can find the kit on the website here: https://shop.obyd.co.uk/b/4aBSF
This kit contains:
Topper Sheet - 3 Toppers and 4 sentiments
1 x Snowy Barn Paper
1 x Frosted Snowy Barn Paper

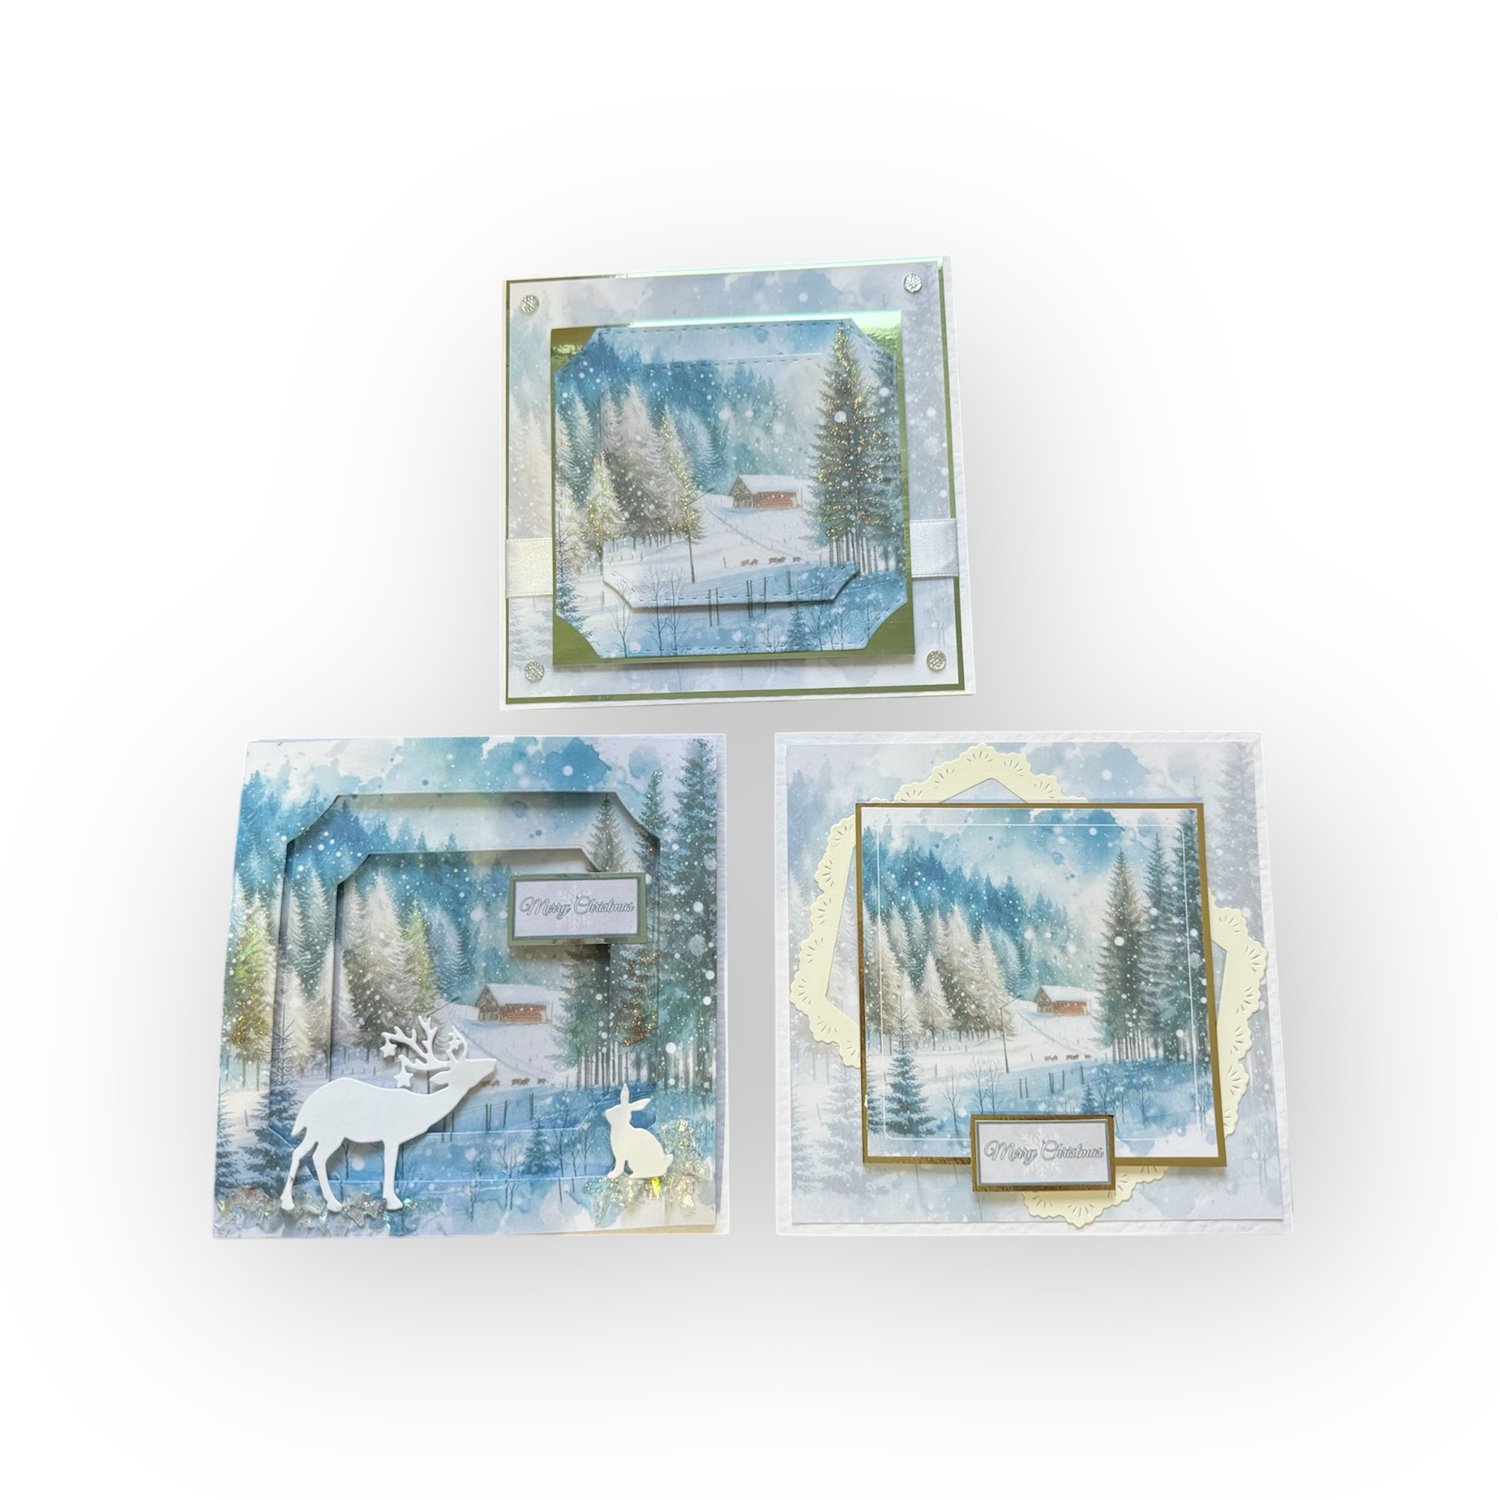
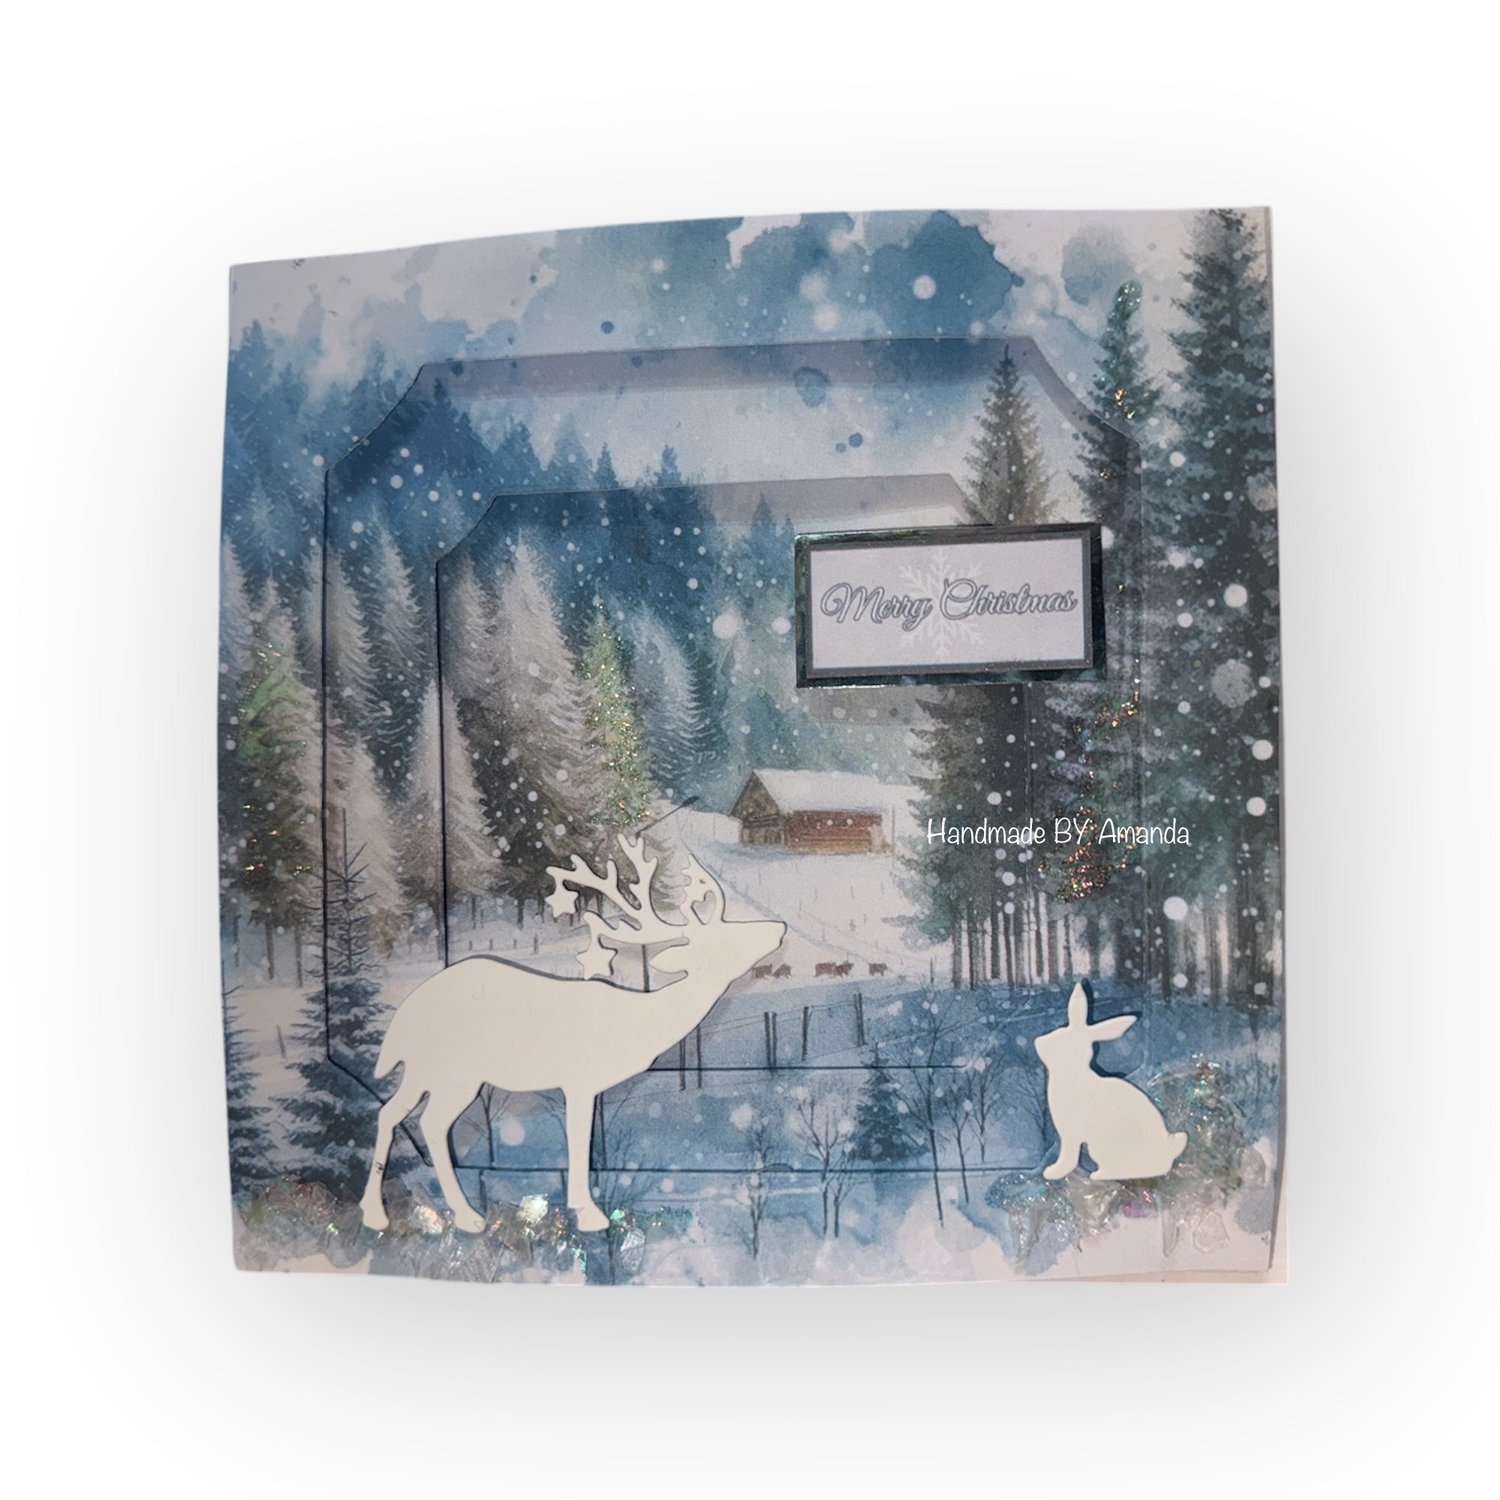
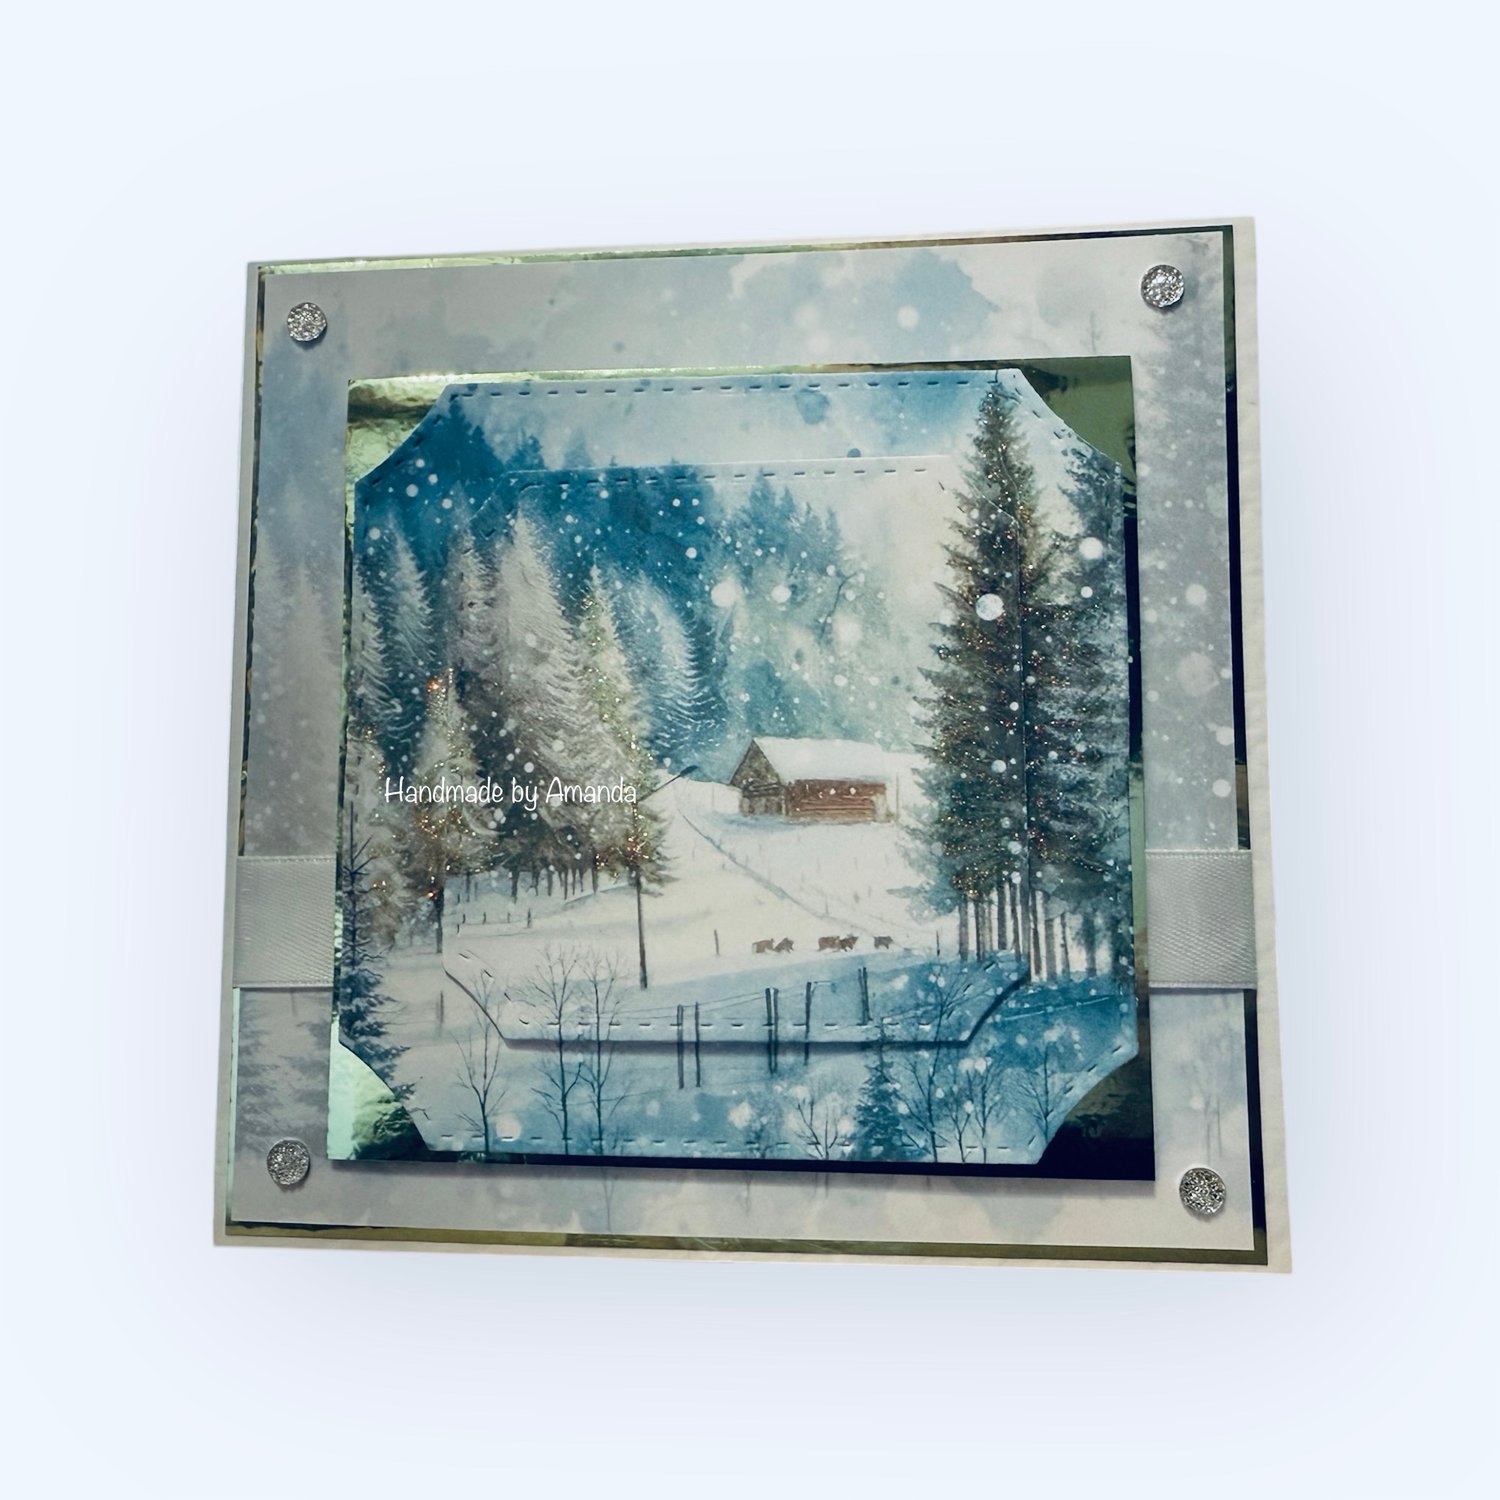
Here is the first card made with the kit
Supplies list:
- Snowy Barn kit - https://shop.obyd.co.uk/b/4aBSF
- 300gsm card white hammered 5x5 card blank - https://amzn.to/48xNZtL
- I printed page 1 from the kit out 3 times onto 300gsm card - it was printed at 70% using my printer settings to fit my project size
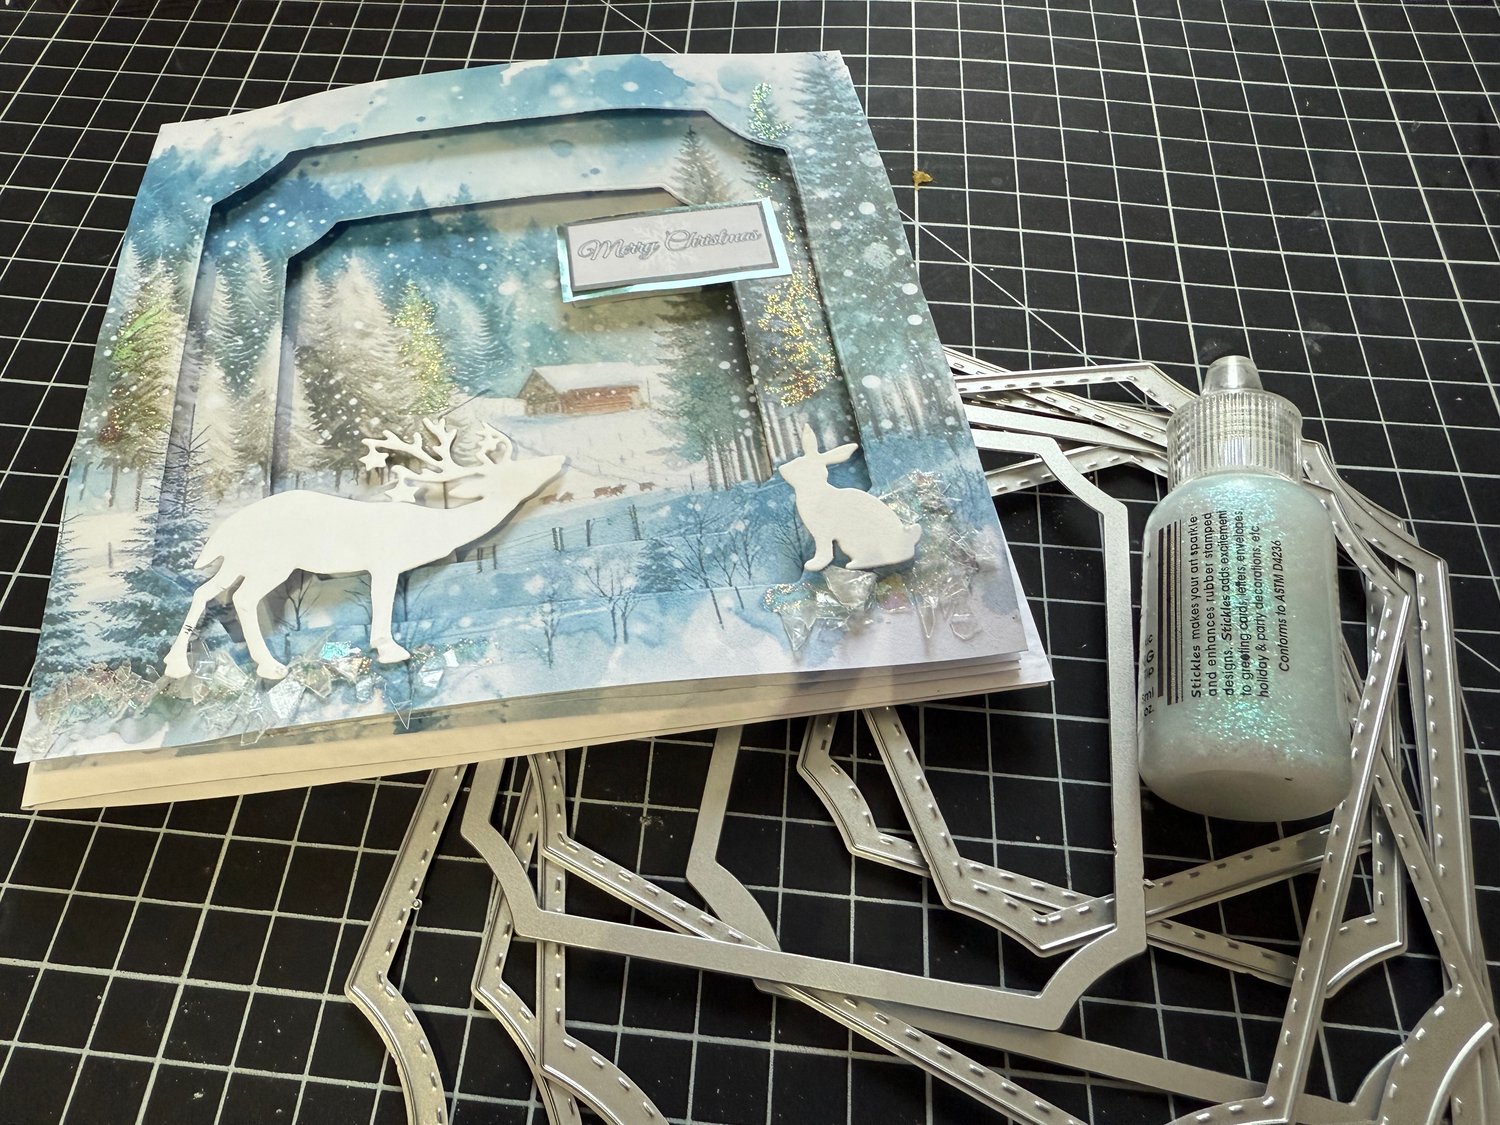
- Square frame nesting die set - 1 layer formed the base layer then i used the dies shown in the picture to cut out 2 further framed invertage layers - you can find this die set on amazon here: https://amzn.to/4eQQWrF (i used the cut outs in another card pictured below) I will explain further down what i mean by pyramage layers or as i normally call them innies and outies lol
- I separated the framed layers on the card using foam pad tape on a roll - https://amzn.to/3Yg47ey
- The Deer and Rabbit die are from Spellbinders Starry Night set by Sharon Sowell
- I used some of my favourite stickles - https://amzn.to/3Y9JhgE on all of the cards to give them so frosty sparkle
- The snow flakes that i used to ground the animals on the card was created using Pinflair's snow in a tub you can find this on amazon here: https://amzn.to/3Ab7b3y
I used mod podge to stick this to the card but there is a bundle available with their amazing book binding glue which you can find here - https://amzn.to/3NCWKJm

- My favourite Tape pens used for the papers are from Crafters Companion - https://amzn.to/3U7itMQ
- Foam Pad tape on a roll is from doCrafts - https://amzn.to/3Udjx1R ( i used this for the sentiment and layers)
Invertage vs. Pyramage Cardmaking Techniques: What's the Difference?
If you're new to the world of cardmaking or looking to expand your crafting repertoire, you might have come across the terms "invertage" and "pyramage." While they may sound similar, these techniques offer unique ways to add dimension and interest to your cards. Let's dive into the details of each to help you master these exciting methods.
Pyramage: Building Up Layers
Pyramage, also known as "pyramid" decoupage, is a technique where you build up layers of the same image in progressively smaller sizes to create a 3D effect. Here’s how it works:
- Select an Image: Choose an image that works well in layers.
- Print and Cut: Print multiple copies of the image in various sizes, then carefully cut each one out
Layering: Stack the cutouts on top of each other, from largest to smallest, using foam pads or adhesive to create depth.
This technique gives your card a striking three-dimensional appearance, with the image seeming to pop out toward the viewer. It’s perfect for adding drama and focus to your focal point.
Invertage: Creating Depth with Layers
Invertage, or inverted pyramage, is essentially the opposite of pyramage. Instead of building up layers, you create a recessed effect by layering smaller images behind larger ones. Here’s how to achieve invertage:
- Choose an Image: Like pyramage, start with an image that lends itself to layering.
- Print and Cut: Print several copies of the image in descending sizes, and cut them out.
Layering: Begin with the smallest image at the base, and layer larger images on top, creating a recessed, tunnel-like effect.
This method gives your card a unique, sunken look, adding depth and interest. Invertage is ideal for creating a sense of perspective and drawing the viewer’s eye into the card.
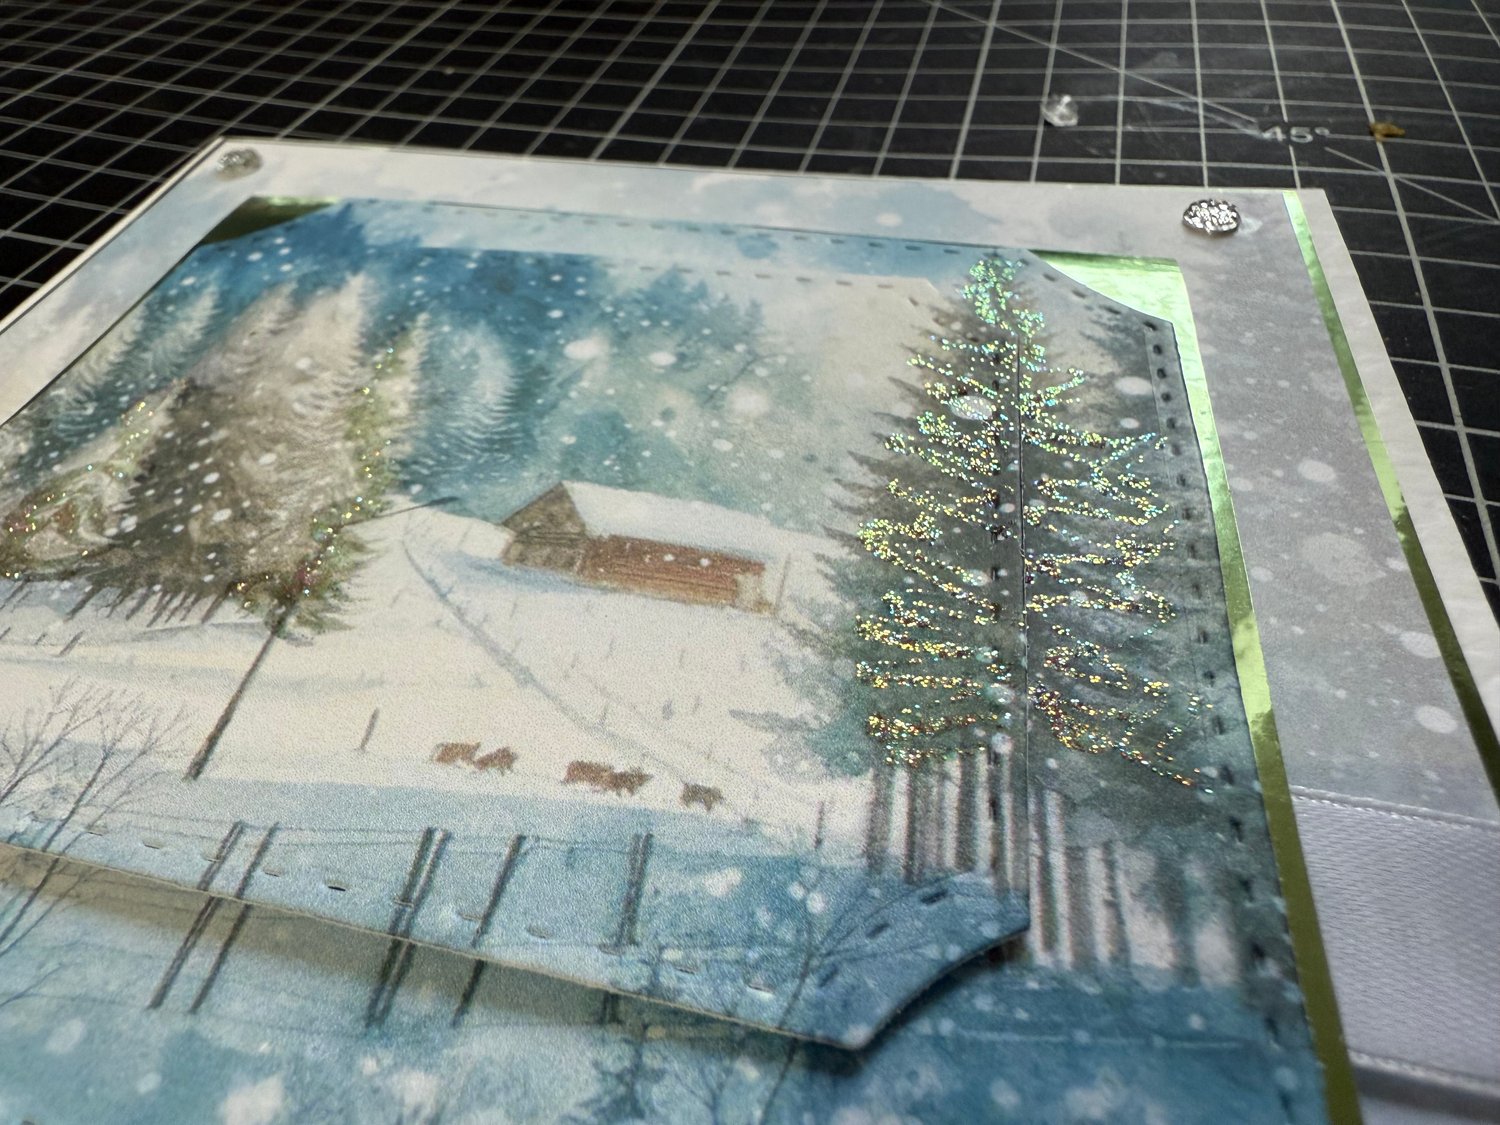
Here is my pyramage card - decoupaged card: Pyramid style - i used the innies from the above card :-)
- This card was created by using page 2 of the kit as the background - i printed it at 70% using my printer settings to fit on my 5"x5" card
- The pyramid layers for the toppers were the cut off pieces (the insides) from the card above
- I used some mirror card for matting and layering - https://amzn.to/4fbh7ZE
- The gems and ribbon are from my stash -
- I used some of my favourite stickles - https://amzn.to/3Y9JhgE on all of the cards to give them so frosty sparkle
You can see clearer on the photo where the stickles was applied
This is my standard square card using a topper from a topper sheet:
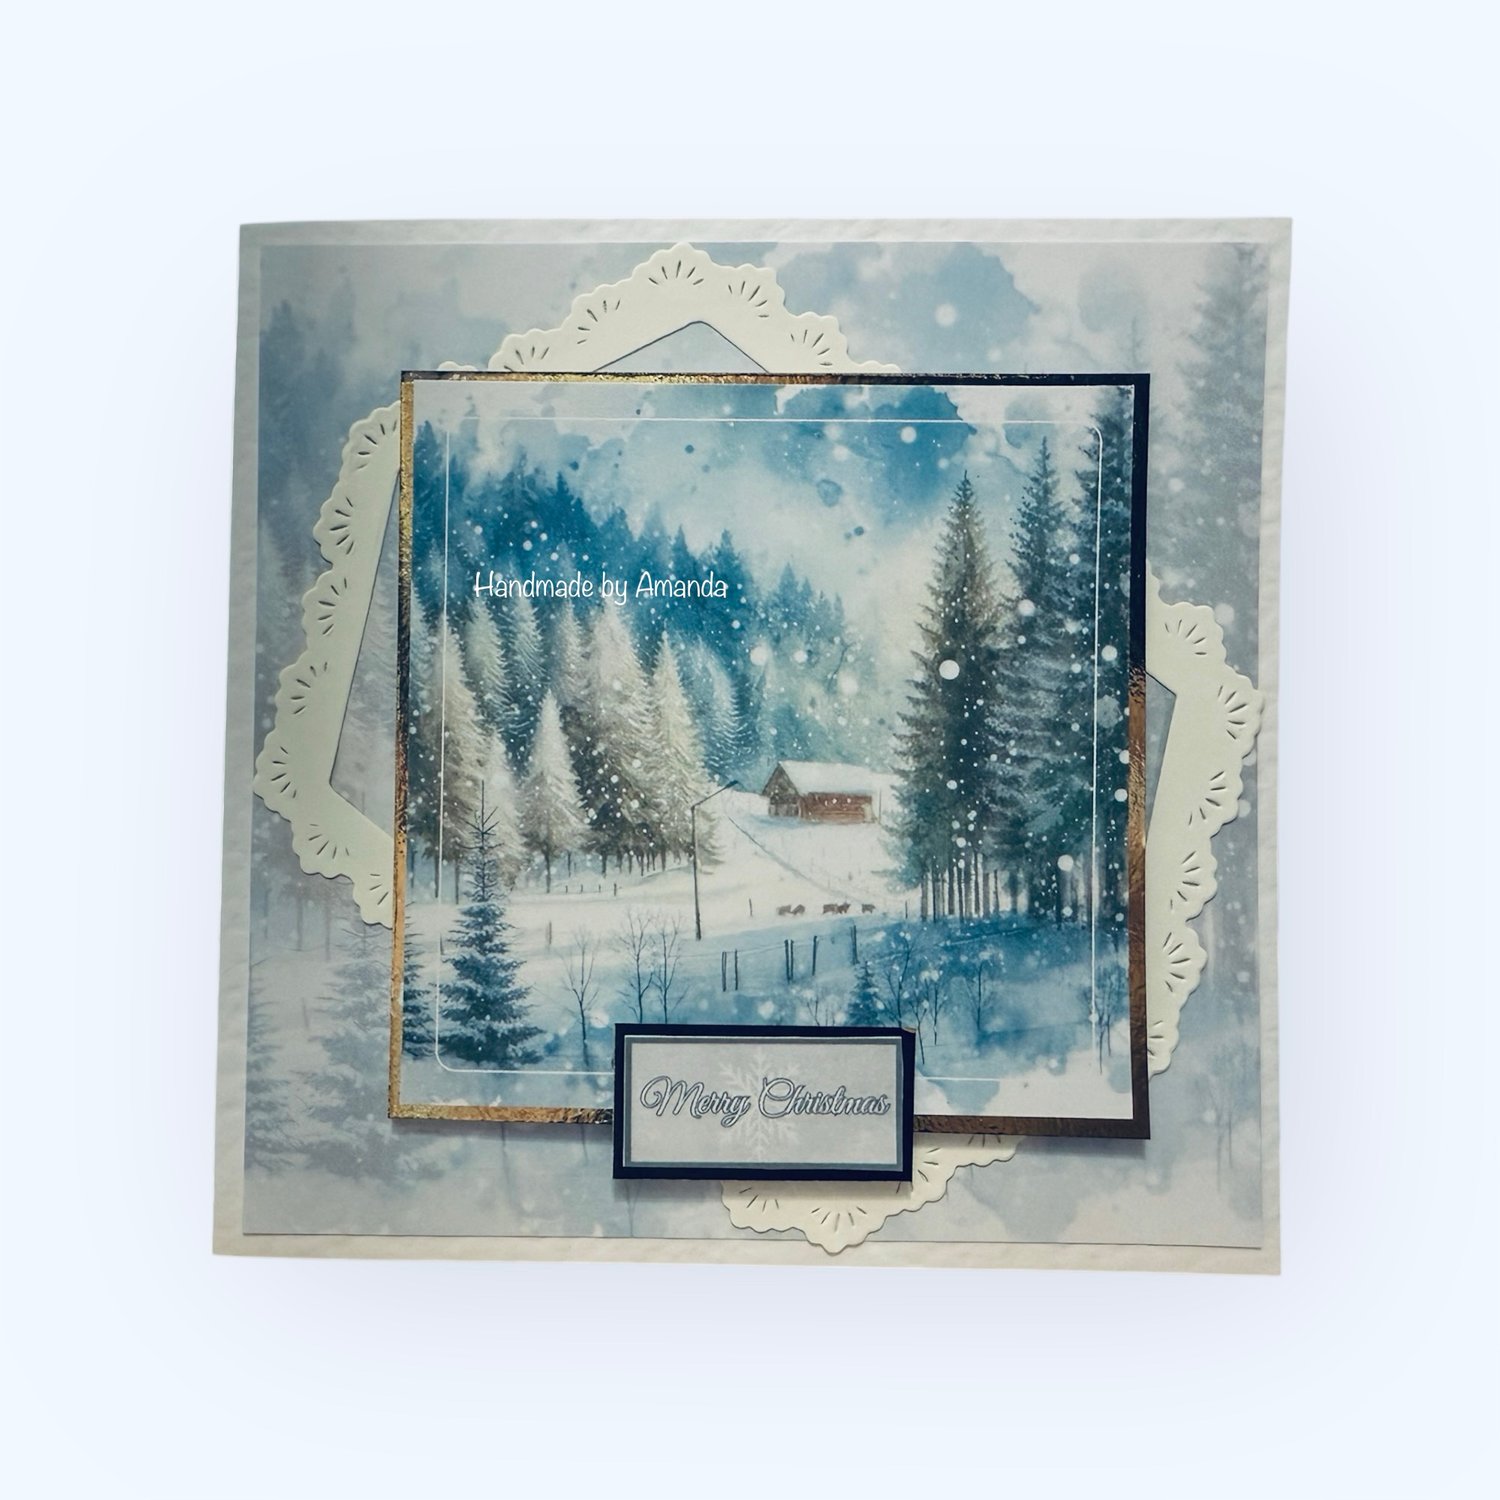
- Page 2 from the kit was used for the background - i printed it the same way as the card above
- The paper, topper and sentiment were printed onto onto my favourite printing paper - https://amzn.to/485UweC
- The topper and sentiment can be found on page 3 of the kit - https://shop.obyd.co.uk/b/4aBSF
- The cardblank, mirror card, stickles links can all be found above
- The frame die is an old one from Dreamees
I hope you have liked looking at today's projects i really enjoyed making them and typing up the supplies list for you. *** Please note that the craft supplies links for the products are from Amazon UK - all items were in stock at the point of writing this blog. If you are reading this in the future and the link doesn't work it is probably because the item has sold out.
Always feel as though you can reach out to me if you can't find something i am more than happy to help you try and find it or at least something very similar. Or if you are not in the UK.
You can always message me through facebook - https://www.facebook.com/OpulenceByDesign/
Thank you for reading today's post
For more crafty inspiration check out our:
Facebook group - https://www.facebook.com/groups/672573406875861
Facebook Page - https://www.facebook.com/OpulenceByDesign/
Blog - https://shop.obyd.co.uk/blog/opulence-by-design-crafty-corner-blog
Download Shop - https://shop.obyd.co.uk/
Website - www.obyd.co.uk
For all of our social media accounts you can find the links here: https://linktr.ee/opulencebydesign
If you have Pinterest i would greatly appreciate a follow as i have spent weeks adding lots of card samples to my various boards - Cardmaking ideas, Christmas crafts, My Crafty Blog board and others so it would be awesome if you could pop over and show it some love - Pinterest Boards
Thank you for looking, happy crafting as always! A xo
Comments
Post a Comment